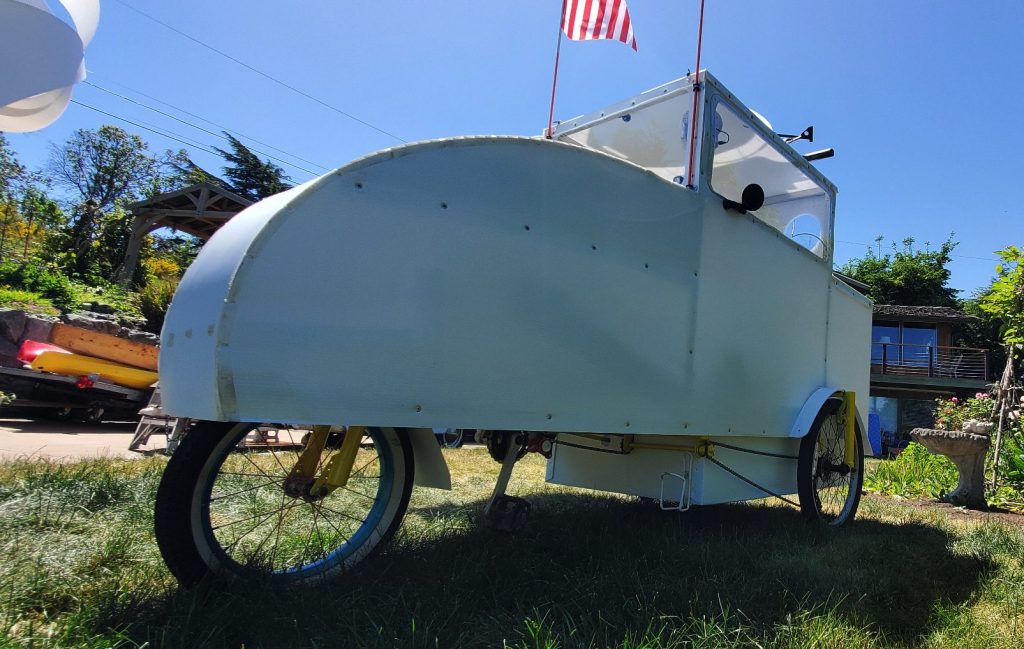

I am a proud American, but these flags are more about RedNeck protection when navigating rural roads.
This was my original idea when thinking of a pedal camper. The idea came after reading the article below back in 1992.
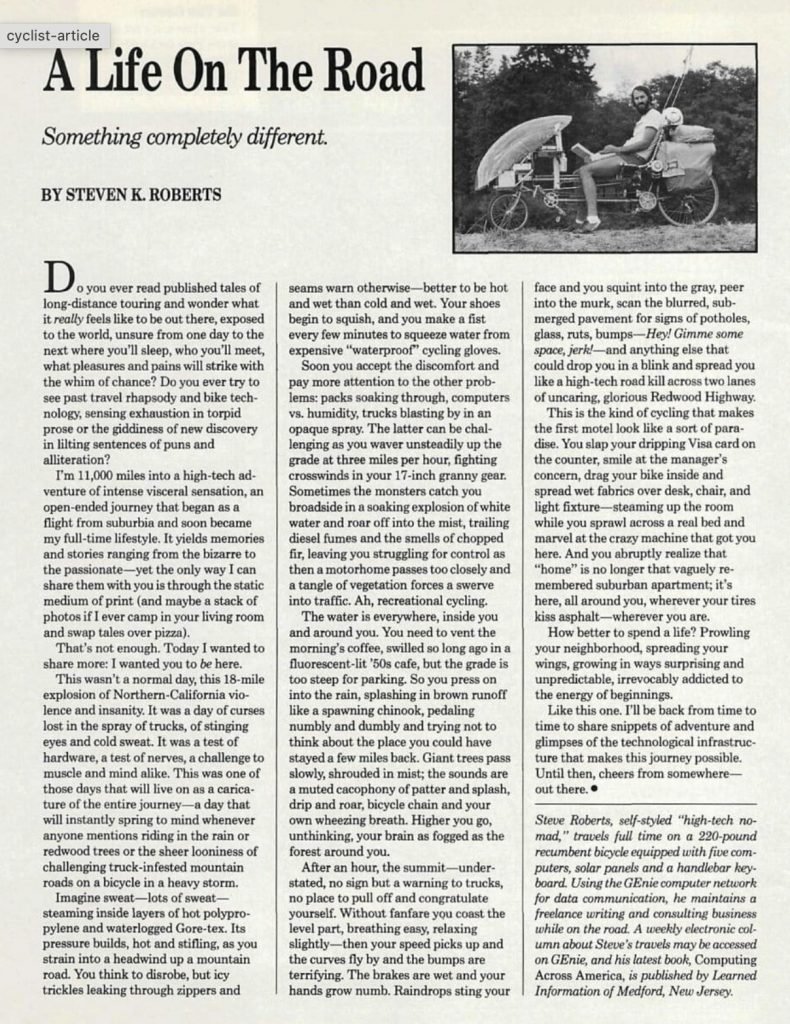
I later met and became friends with Steven Roberts as he settled just up the road from me. I spent several days helping with his latest creation, the Microchip, and conversed with him on my thoughts of an enclosed trike with bed and all. He showed me a picture he took that was very similar to what I had in mind.

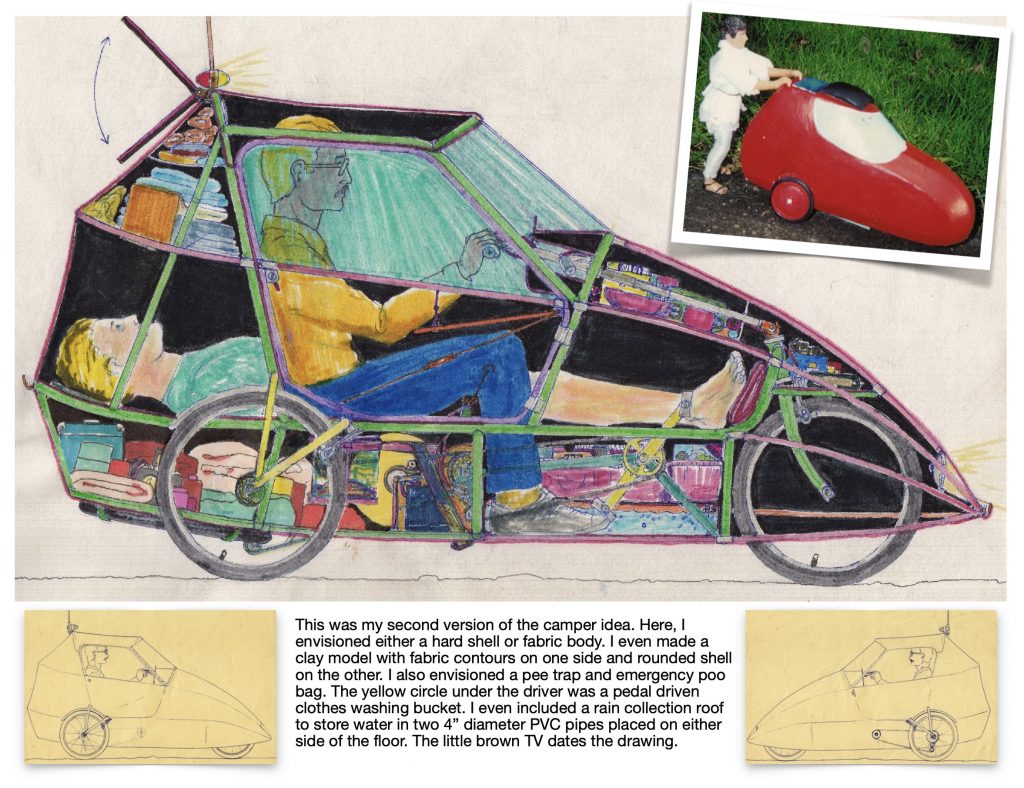
Below is an exerpt from my Ebook ‘Human Powered Vehicles’ that shows an early rendition. I even made a clay model with G.I. Joe as my pilot.
My idea of making a bike towed camper back in 2005 was actually a fluke. It started as a Buringman project; a post apocalyptic bug-out survival pod with not much intent of being used in the pre-apocalyptic era. Later I made a few more bike campers, but this idea of combining the tow vehicle with the towed camper made sense. Why not strive to eliminate complexity and redundancy. Why not shed some extra hardware, especially when your leg muscles are doing all the work to move the thing down the road. Some say Solar Power electric assist is the way to go, but isn’t that just more complexity, not to mention money? When touring, what’s the rush? Take your time. Gear the trike down. KISS. Keep it simple stupid! Admittedly I added a 13W solar panel which cost me $30, but this little light-weight panel goes a long way helping power USB charged safety, communication and entertainment devices.
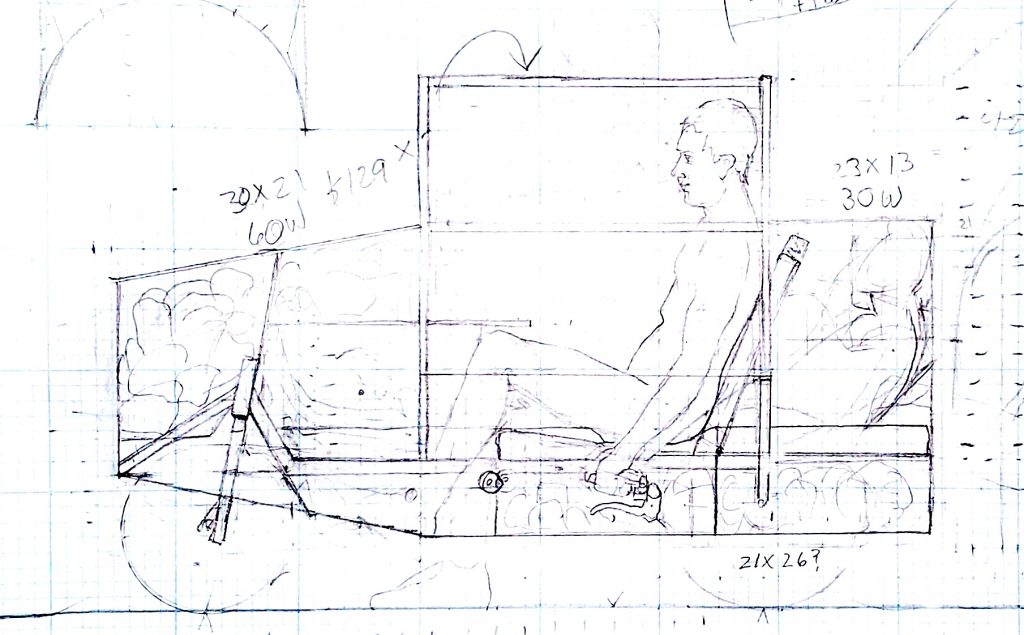
This was my final concept drawing. Many more drawings were rendered before deciding on this particular configuration. Although not ideal, the 35″ width will allow the vehicle into most ground floor Motel or home front doors.
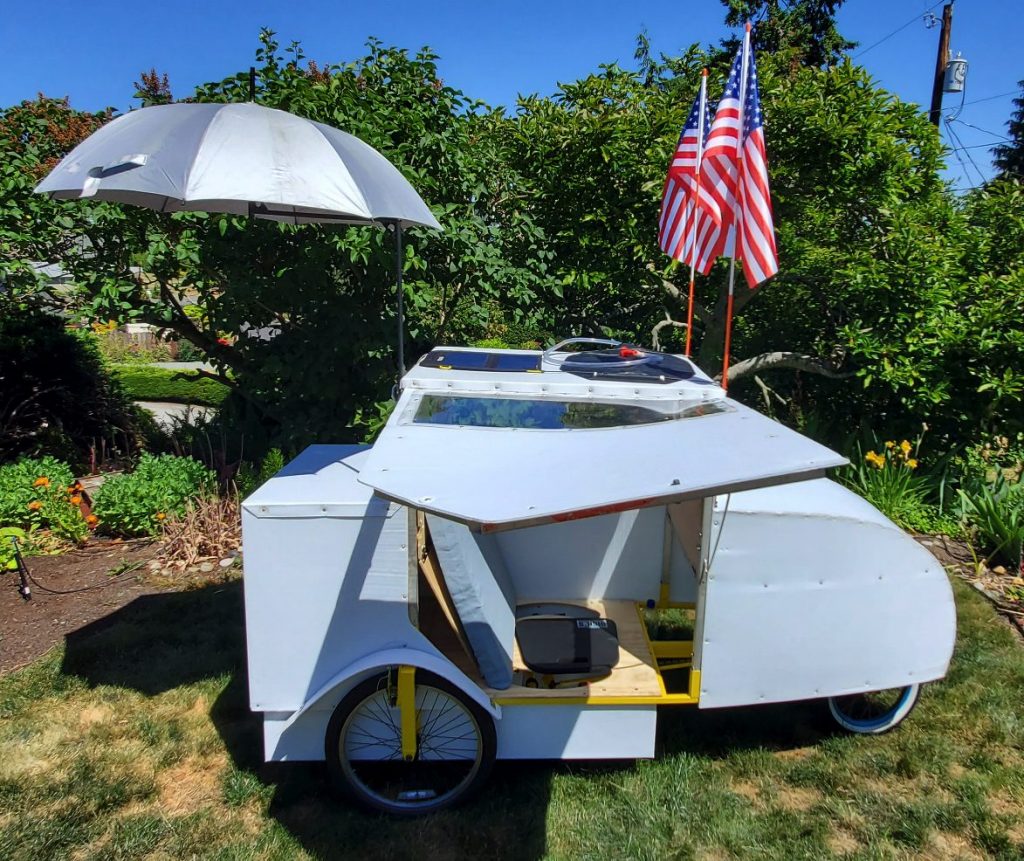
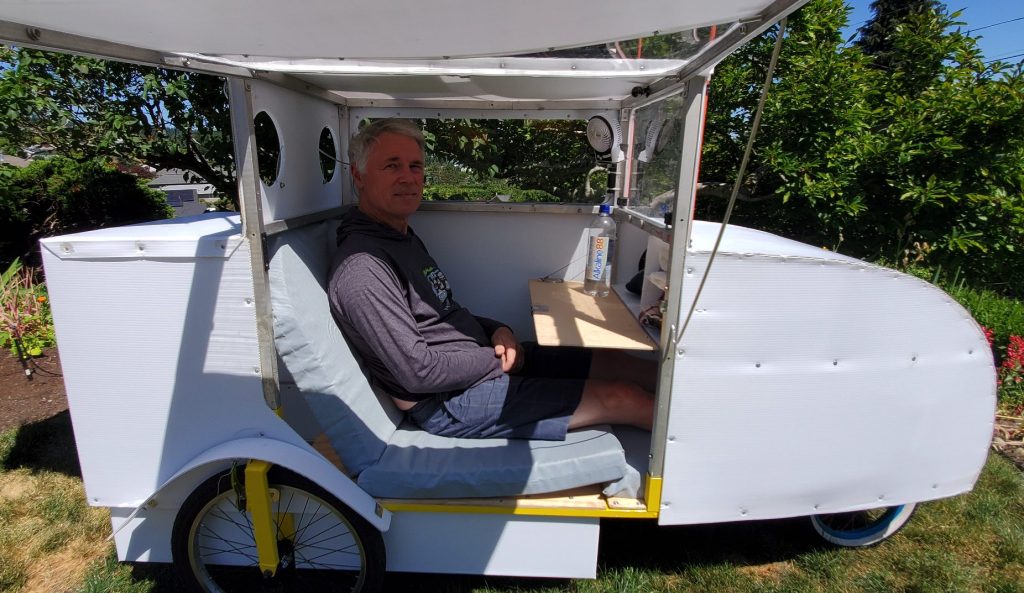
The door swings up to act as a sun and rain shield. Here you can see the solar shower bag heating up water for a warm shower.
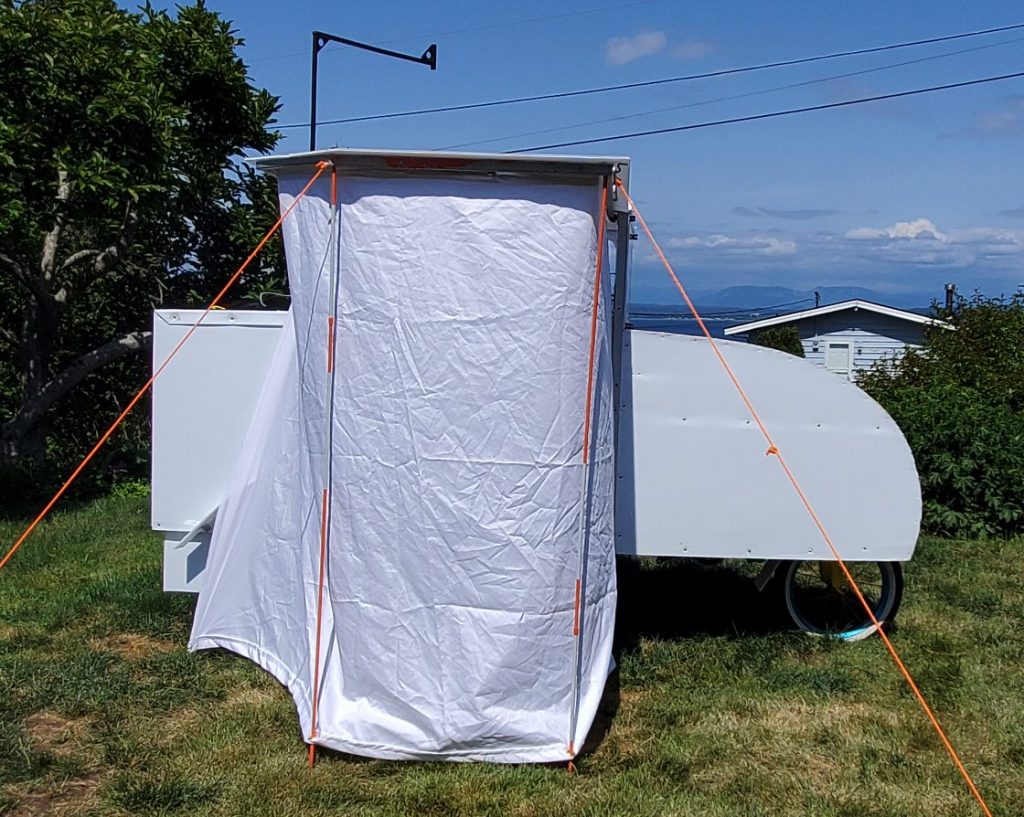
When camping, the two fiberglass flag-poles are used to help support the open door. A snap-on privacy screen (bed sheet) wraps around the perimeter of the door for showering and toilet use, and can be used on the bed when sleeping.
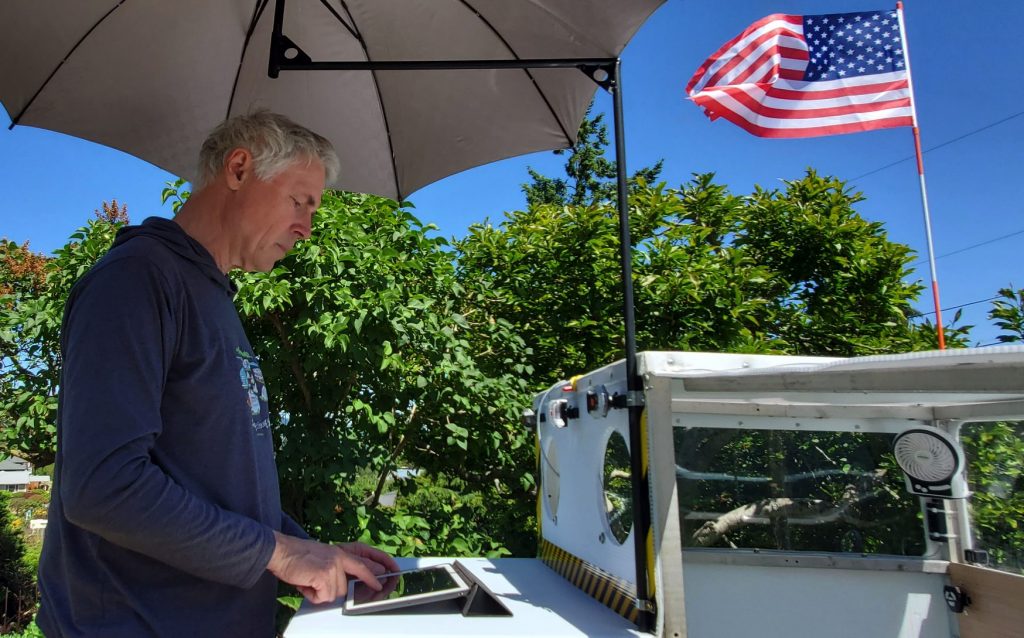
The back has a slight angle for rain run-off, but can be used as an outside work table. The sun umbrella can be repositioned by swinging it left or right.
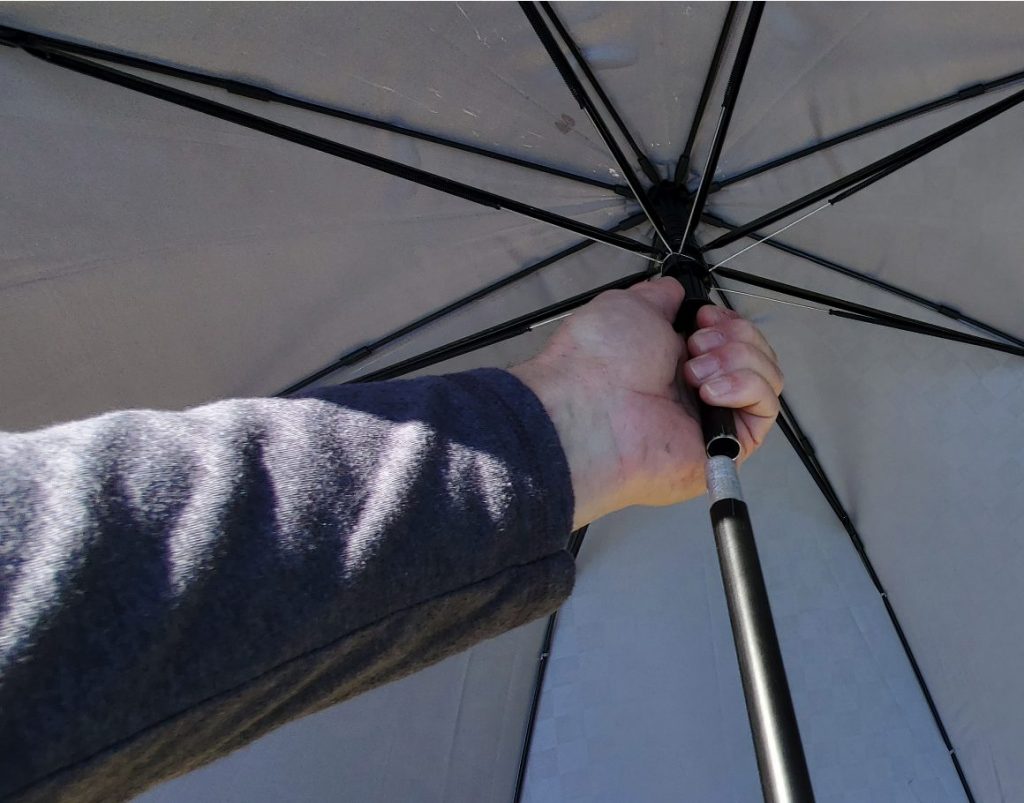
Here is the detail on the cut and plug used to to keep it as a working umbrella. Without the pole, an umbrella folded down will destroy itself, as I learned…

The two round windows help to see what’s behind me, and have a pivot that allows them to open and close. I should have added bug screen. To do list… The portable 13w ECEEN solar panel has two USB ports to help recharge my fan, horn, headlights, blinkers, phone and tablet. The cord goes thru the window when in use.
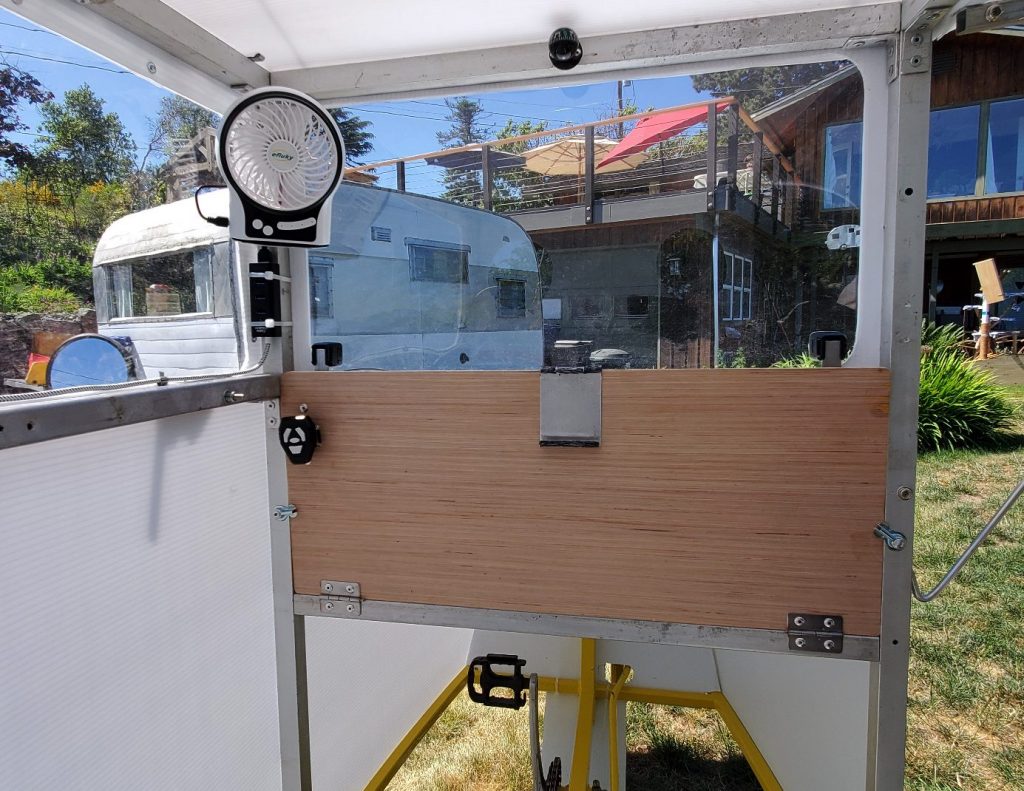
Here you can see the cord going to a four-port USB plug-in hub bust below the three-speed fan. The wireless blinkers are on the left side of the fold-down table. The custom made aluminum cell-phone clip resides in the center. Above the windscreen is a compass (where am I?) I need to create a way to adjust the side mirror from the inside. Yet another to-do item.
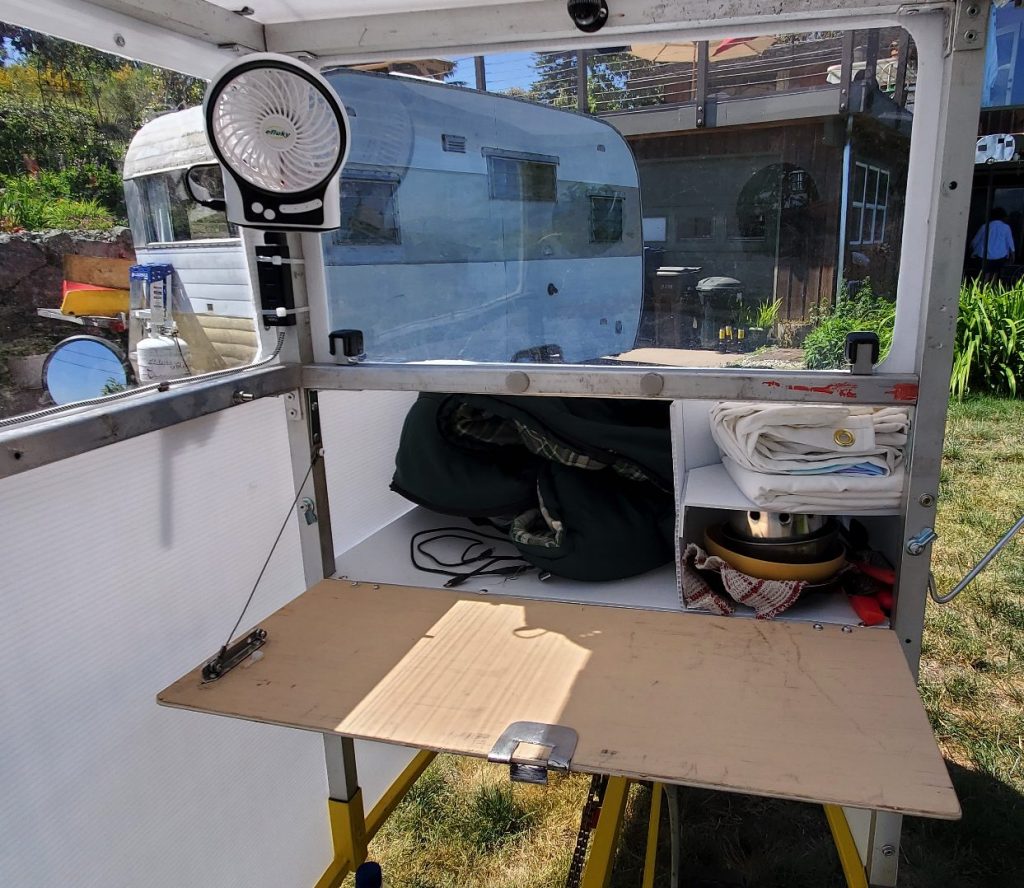
The three-foot long front trunk holds my sleeping bag, pillow and other odds and ends. To the right are my cooking supplies and privacy curtain.
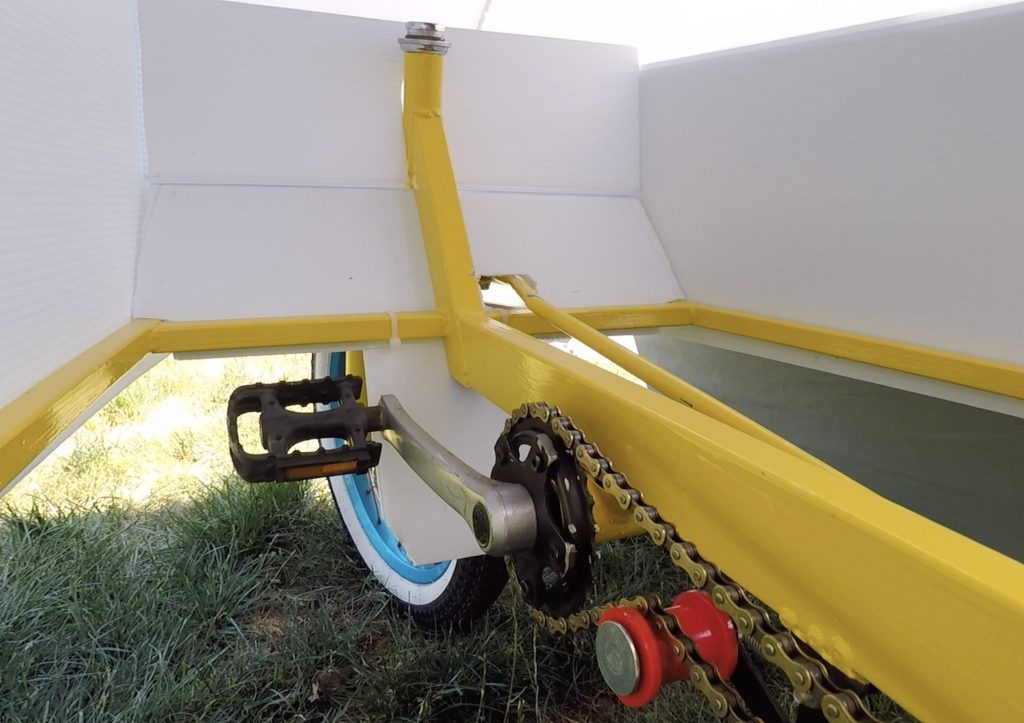
A small storage area resides in front of the steering head for heavy items. It would be a good place for lithium batteries if I ever decided on electric assist. Here you can see the chain tensioner. A bit overkill, but it’s what I had.
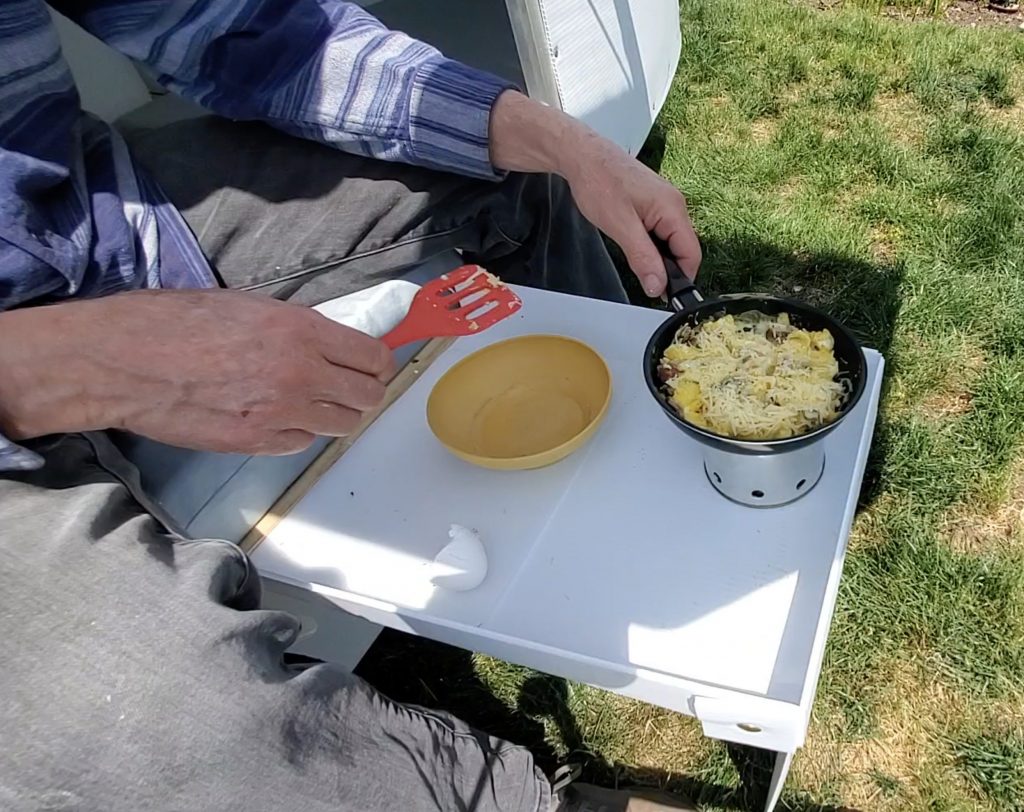
This simple Origami folded platform acts as my kitchen counter. The rear end slips under my plywood floor while the front half folds over and down to act as the supporting leg. Two side wings fold up and a front wing fold around to the right side and snaps in place. This makes a pretty sturdy surface for cutting and prepping food. The flaps also act as a wind break for the stove.
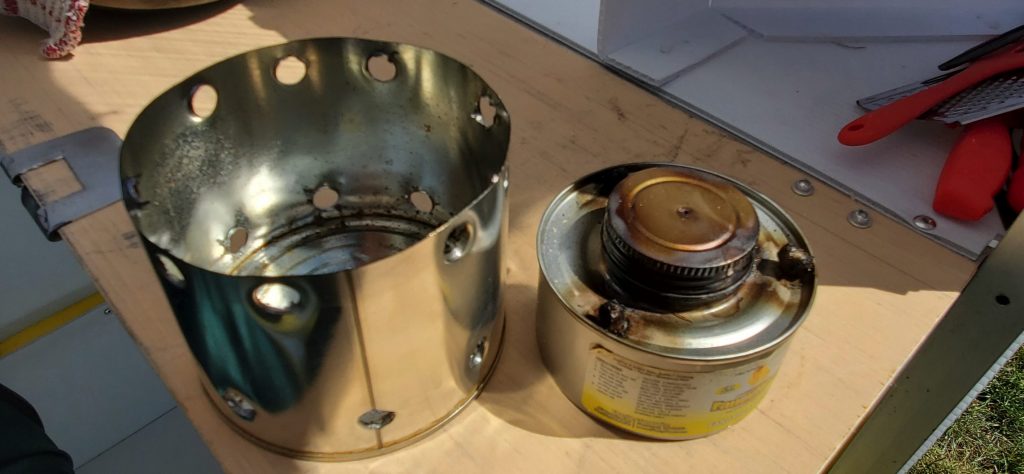
The cook stove is a modified Chaffing dish warmer. Use caution if you decide to try this. I popped off the inside cap that holds the fiberglass wick, separated the wick into three strands, poked three holes and re-installed the wicks. I poked a small vent hole in the lid, tore out the plastic cap gasket and made a rubber gasket for storage. Do not use the gasket when cooking!
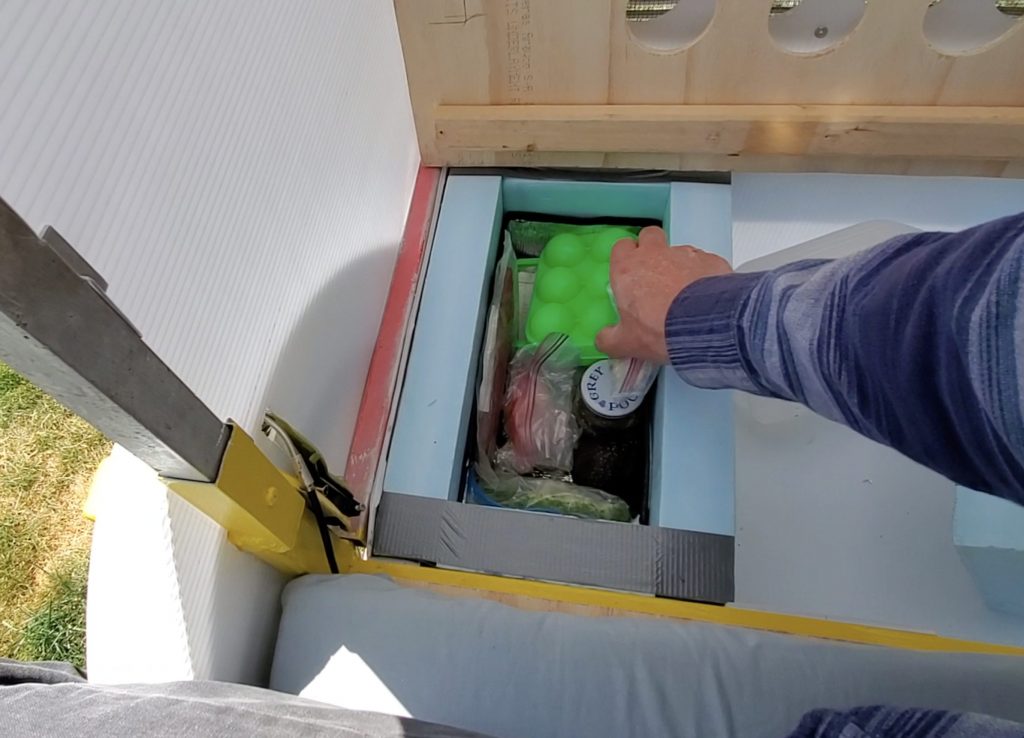
The cooler was made using 2″ thick blue dense foam board. Skewers were shoved in to secure the sections, then duct taped together. I dollar-store windshield cover was used to make a foiled enclosure. This one pounds cooler holds a small quantity of perishable foods for a short trip.
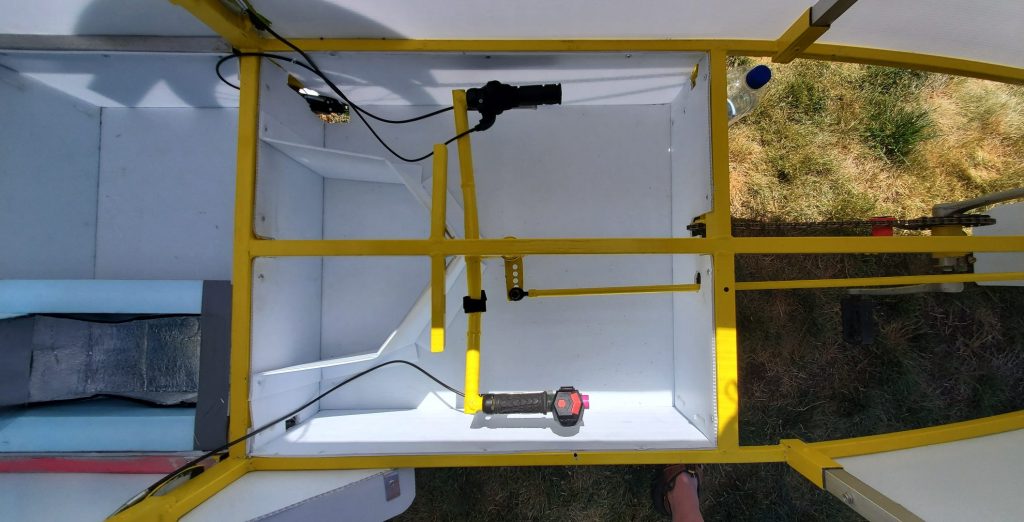
This photos shows most of the frame work. the main ‘T’ frame is made of thin wall 1″ by 2″ box steel. 8″ long 1″ square box steel was used to support the upper aluminum box frame. 3/4″ box steel was used for the outer frame work. The handle bars were custom cut to fit just below the bed platform. The horn/alarm resides on the handlebar end.
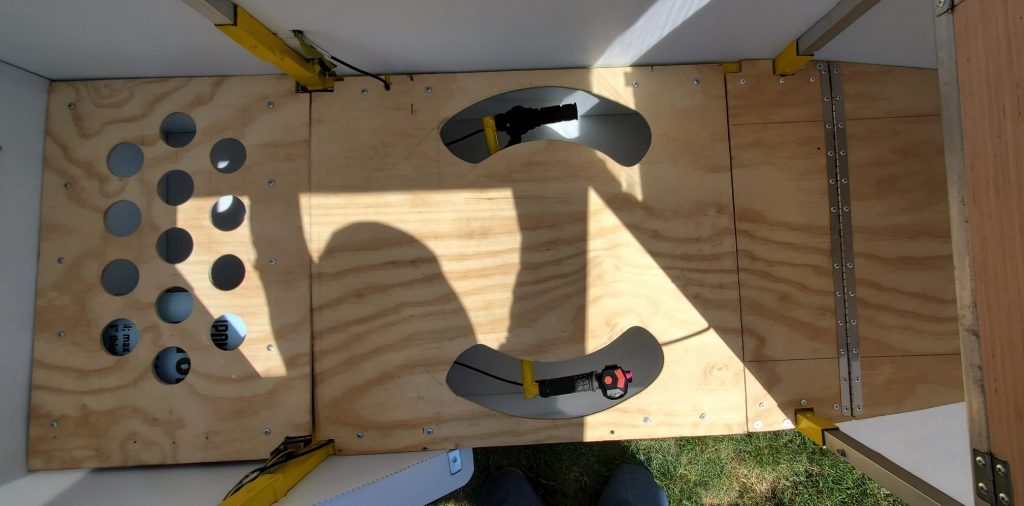
This shows the three 3/8″ thick plywood bed platforms in place. These also can be moved around for back rests.
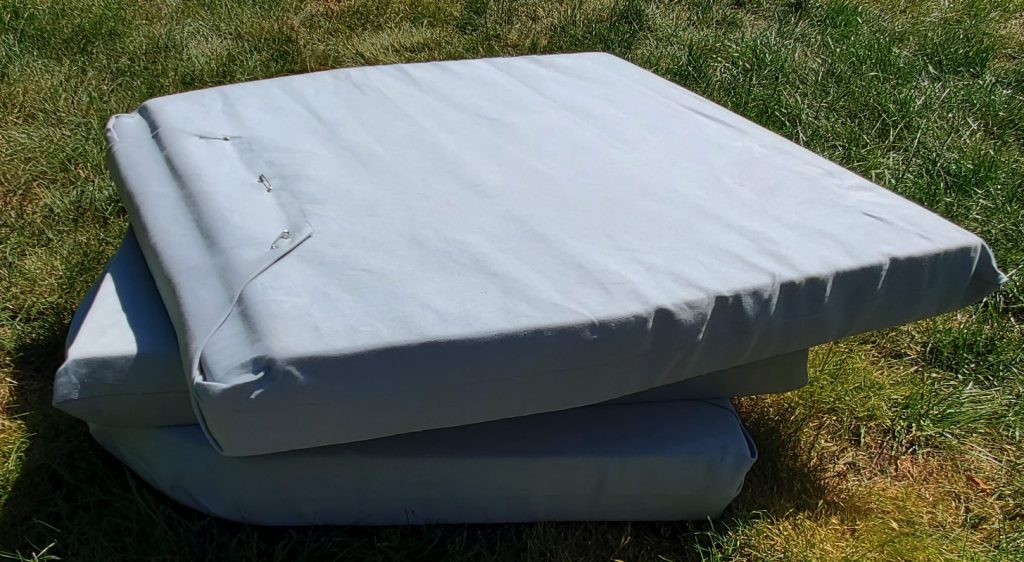
The 3″ thick foam pads are enclosed by a thick fleece type bed sheet. The covers are removable for washing.
These thick cushions make a very comfortable bed and chair. My pillowcase was made from the same material and stores my coat when not in use.
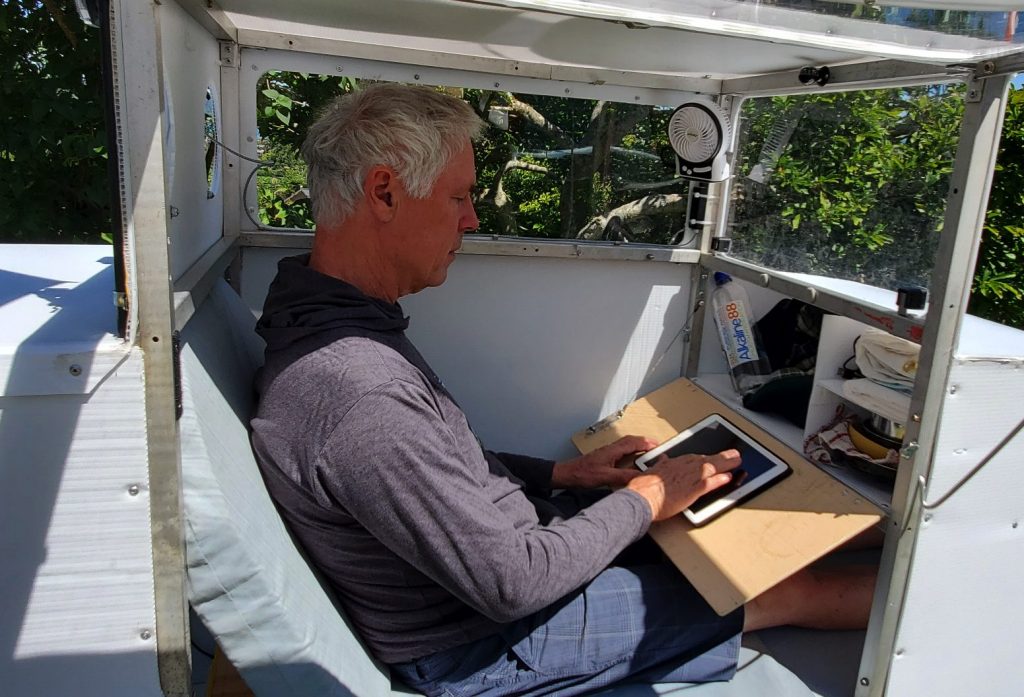
The rear floorboard here acts as a backrest support for a very comfortable reclined position. One cable holds the table in position. In this position I’m able to comfortably read, draw or use a tablet.
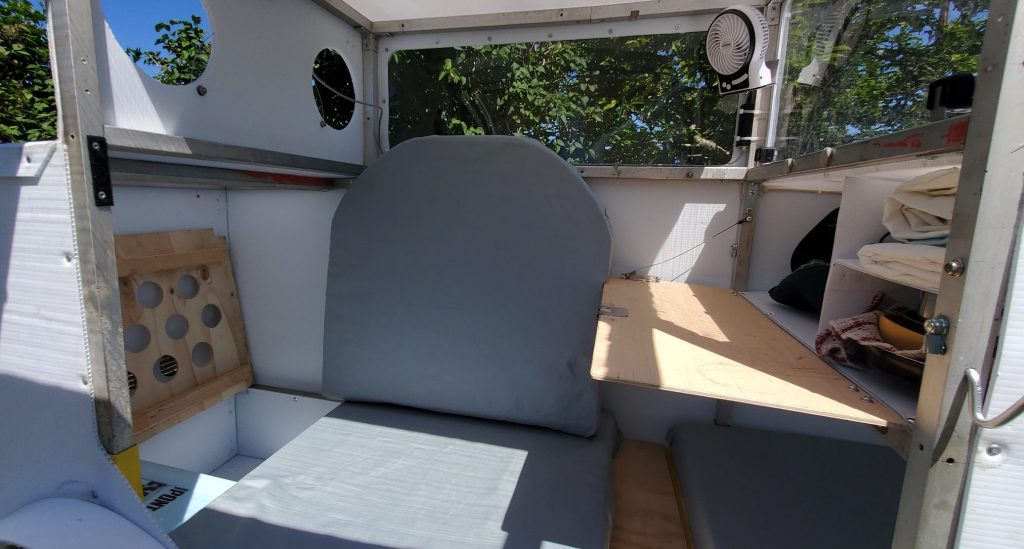
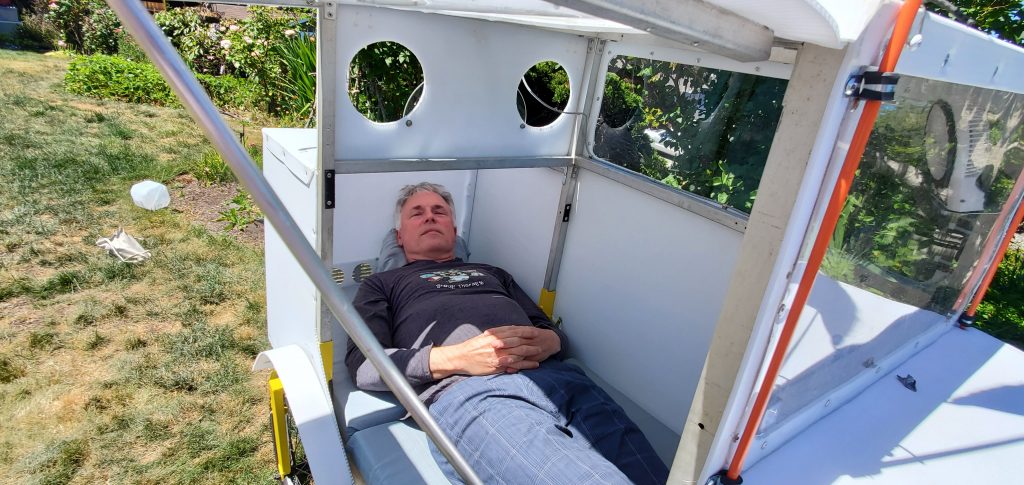
Here the cushions are in cooking mode or for just hanging out and enjoying the view or conversing with someone.
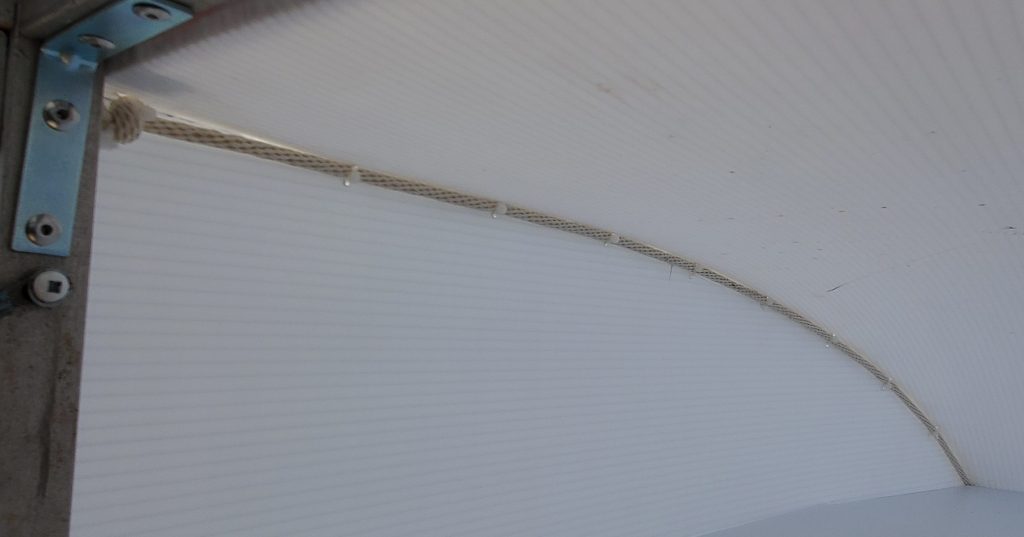
Here is some detail on how the front panels were joined. I used thin 4″ long zip ties spaced every 4 inches and added a 1/4″ nylon rope to keep the ties from cutting thru the 4mm fluted plastic edges. I normally use Gorilla tape to seal the seams and zip tie holes, but this time I used silicone. The downside to this technique is that dirt and dust sticks to these areas, discoloring all the areas that were siliconed.
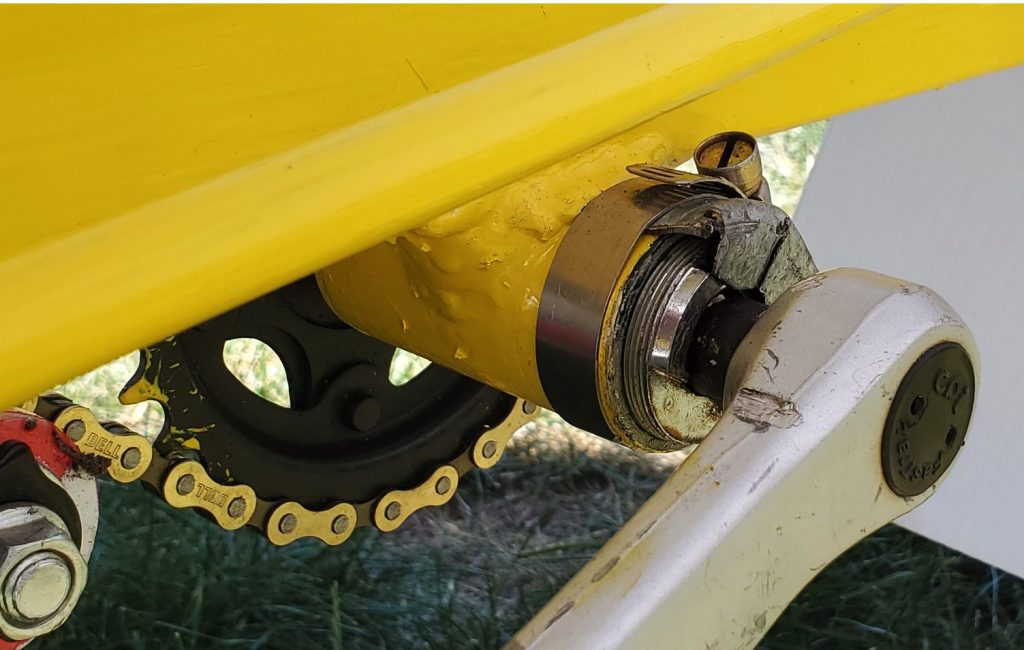
I added a jack-shaft on my rig. Unfortunately I reversed the front crank which led to the crank cup bearing constantly unscrewing itself. This was my simple hack to keep the nut in place.