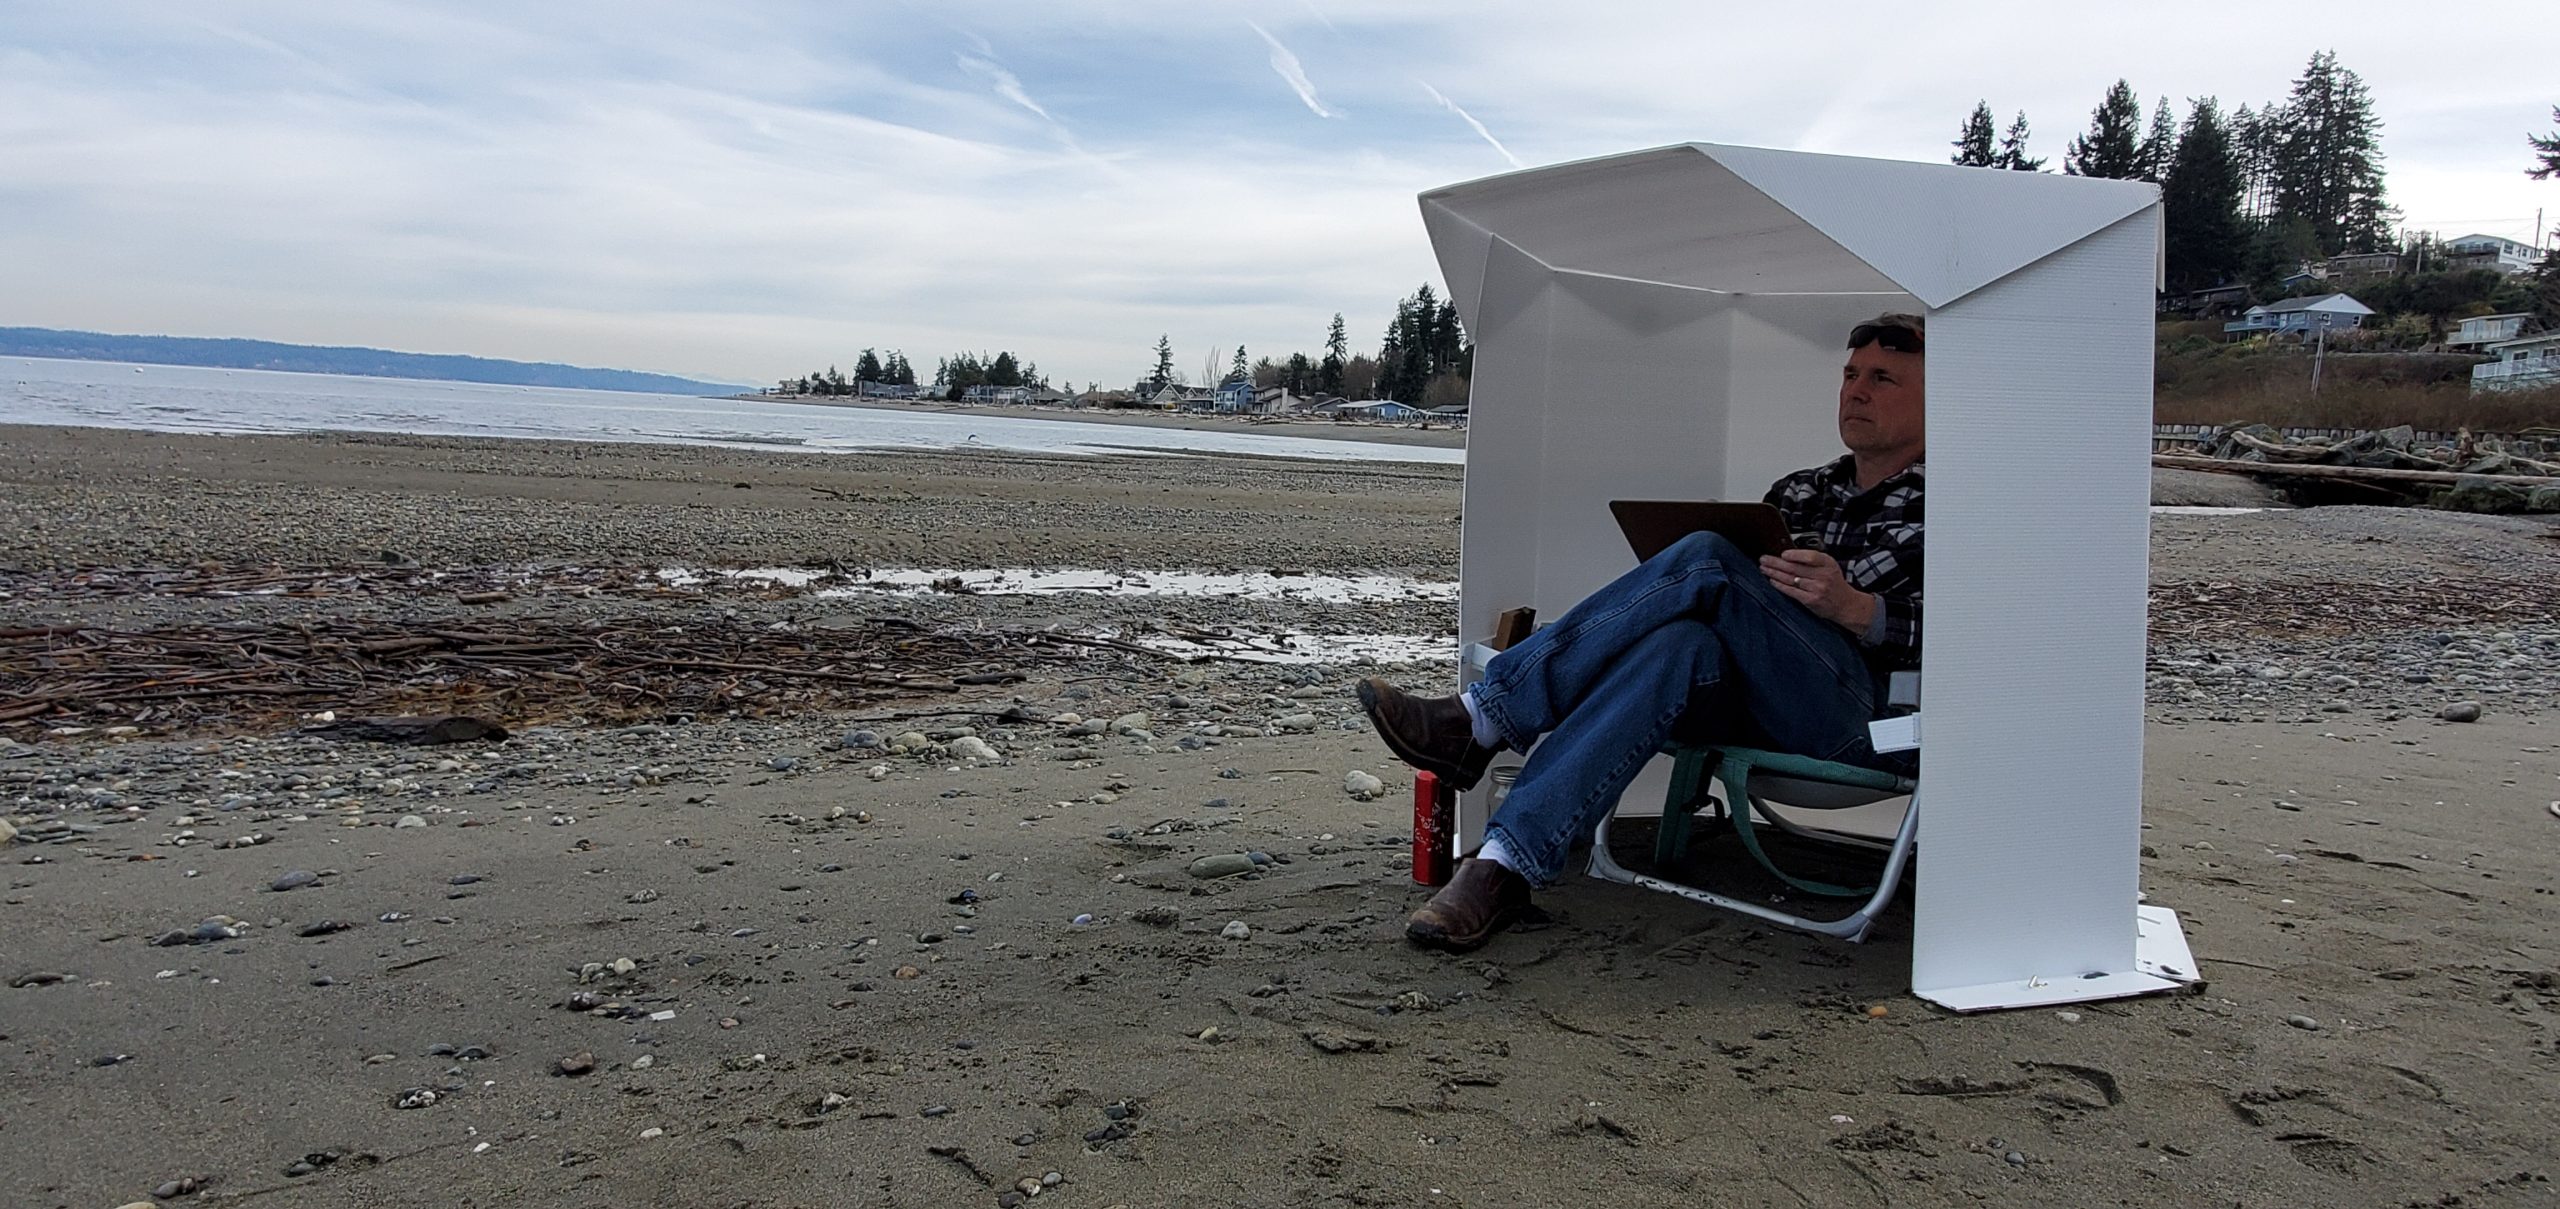
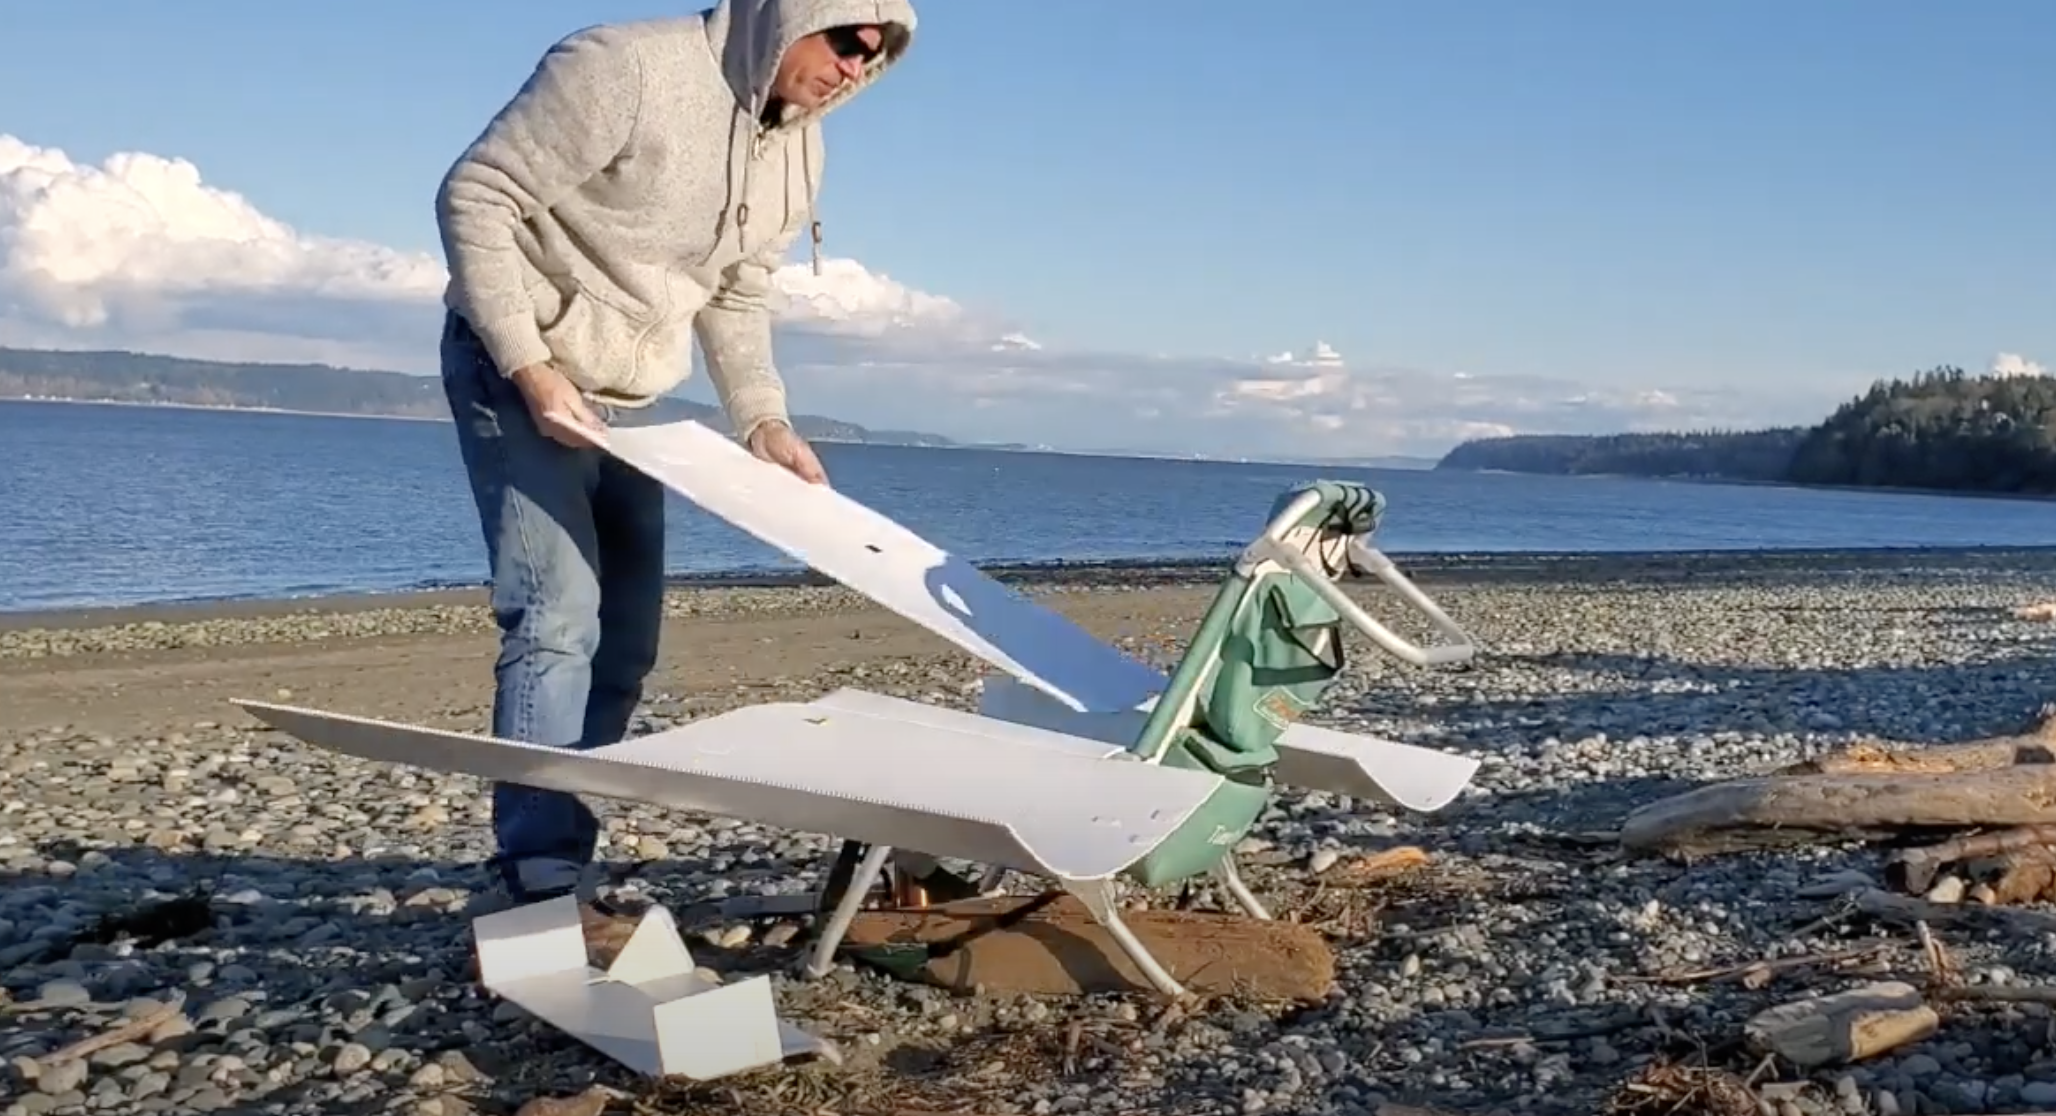
After making my last shelter for landscape drawing, I decided it was too large and too big to carry.
I wanted something even smaller that I could attach to my Tommy Bahama chair.
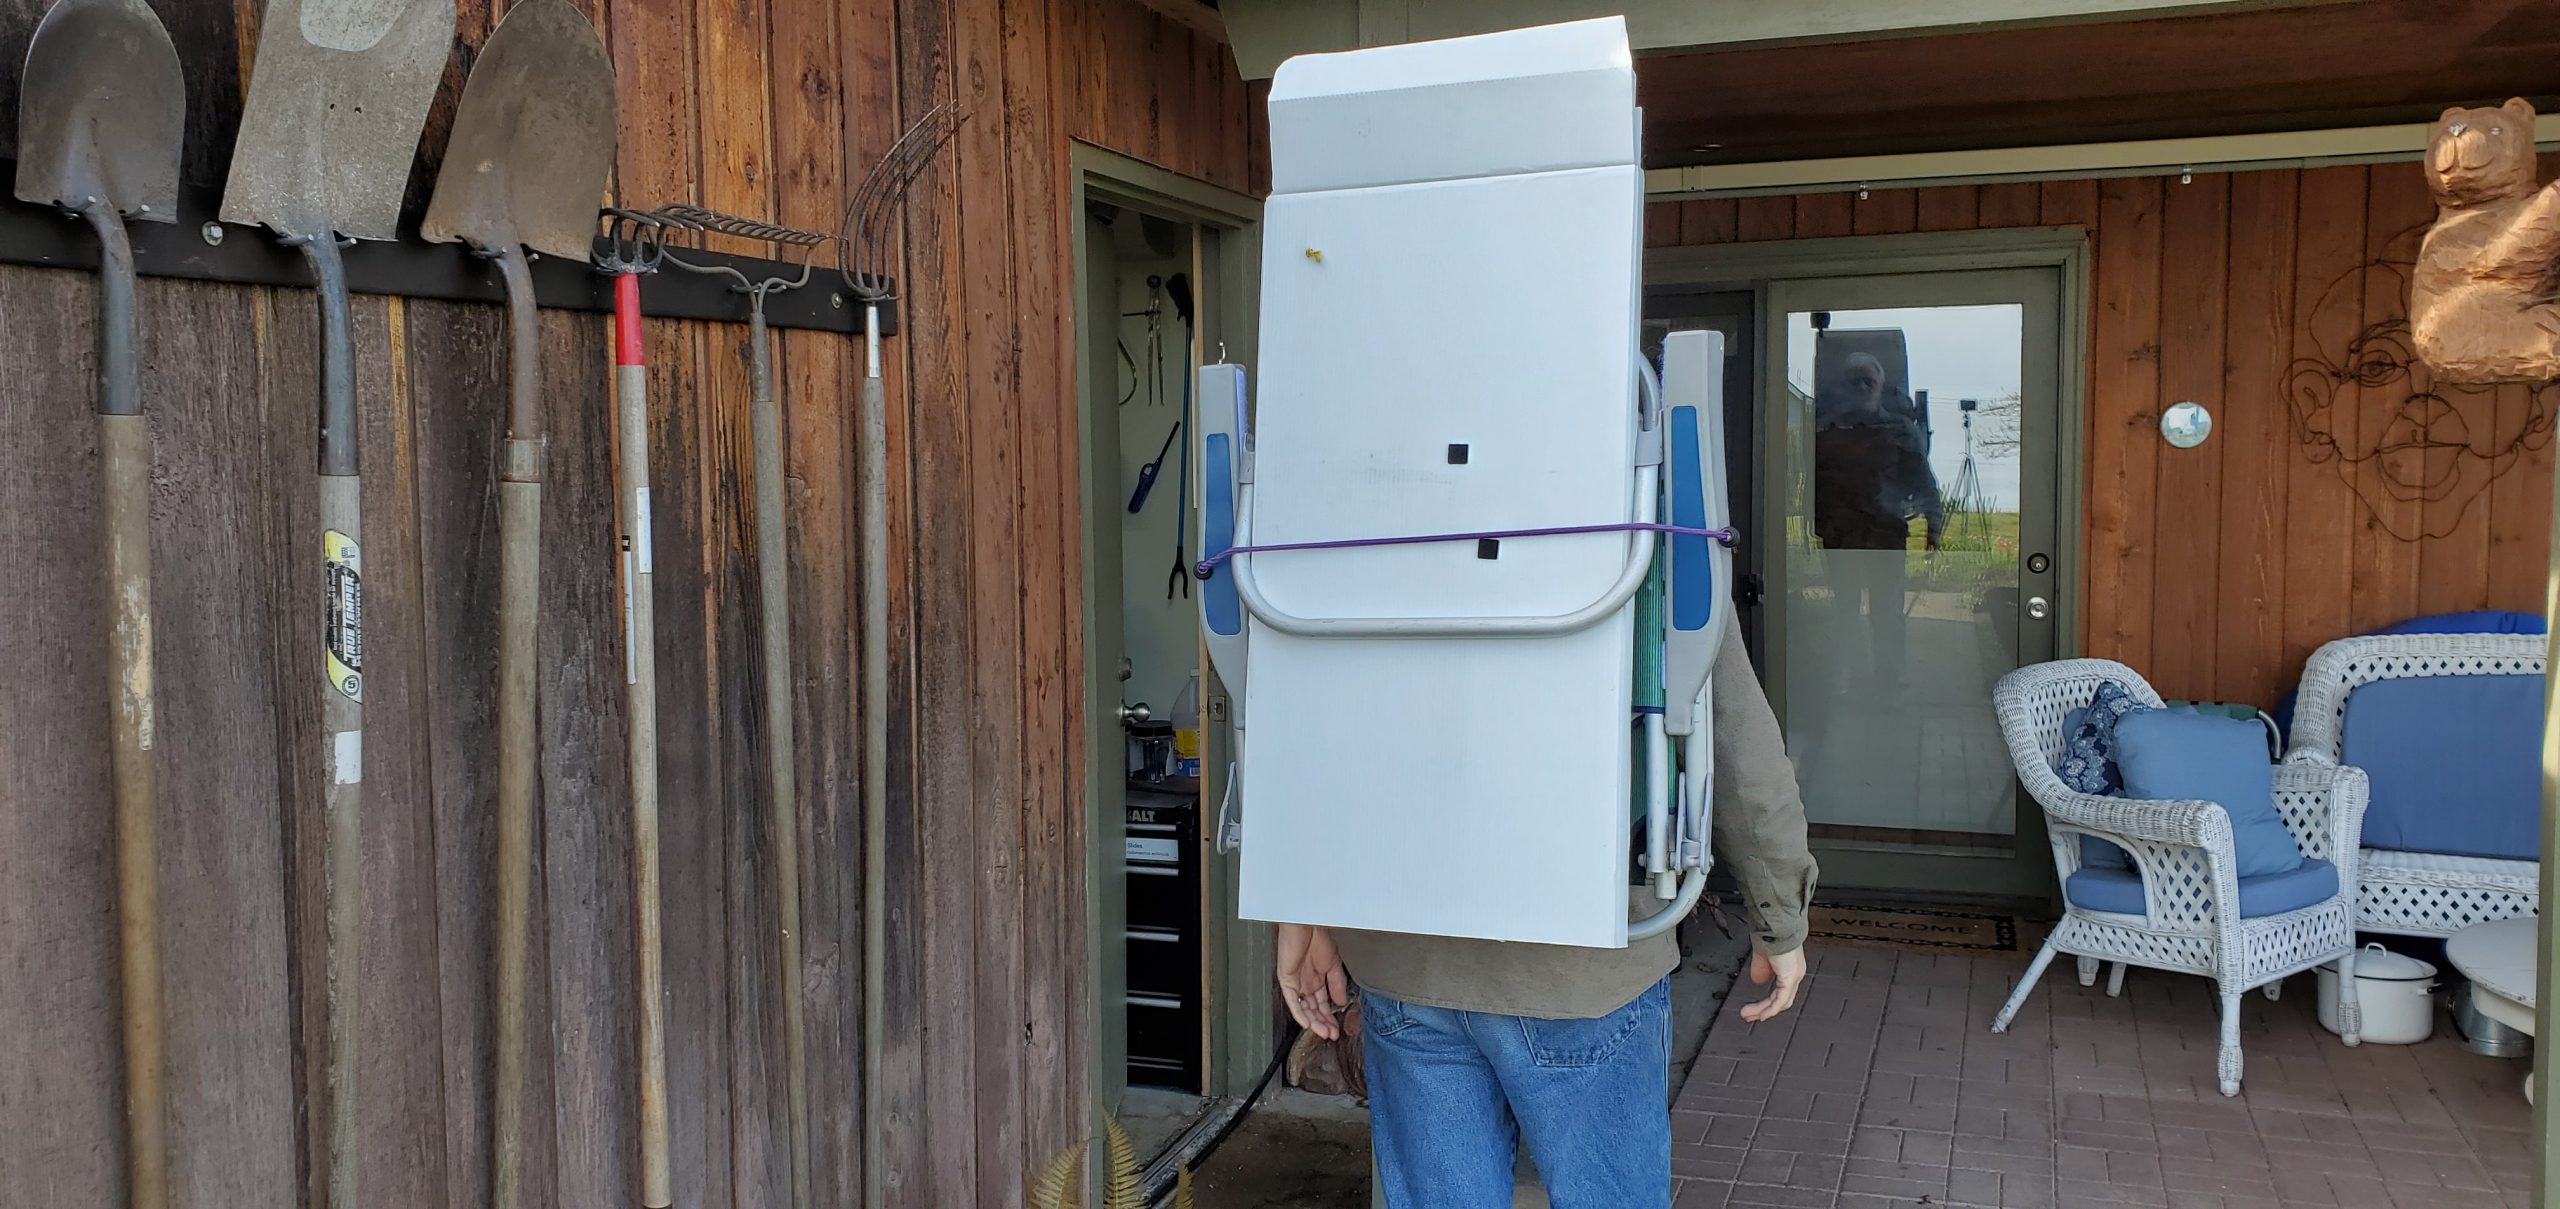
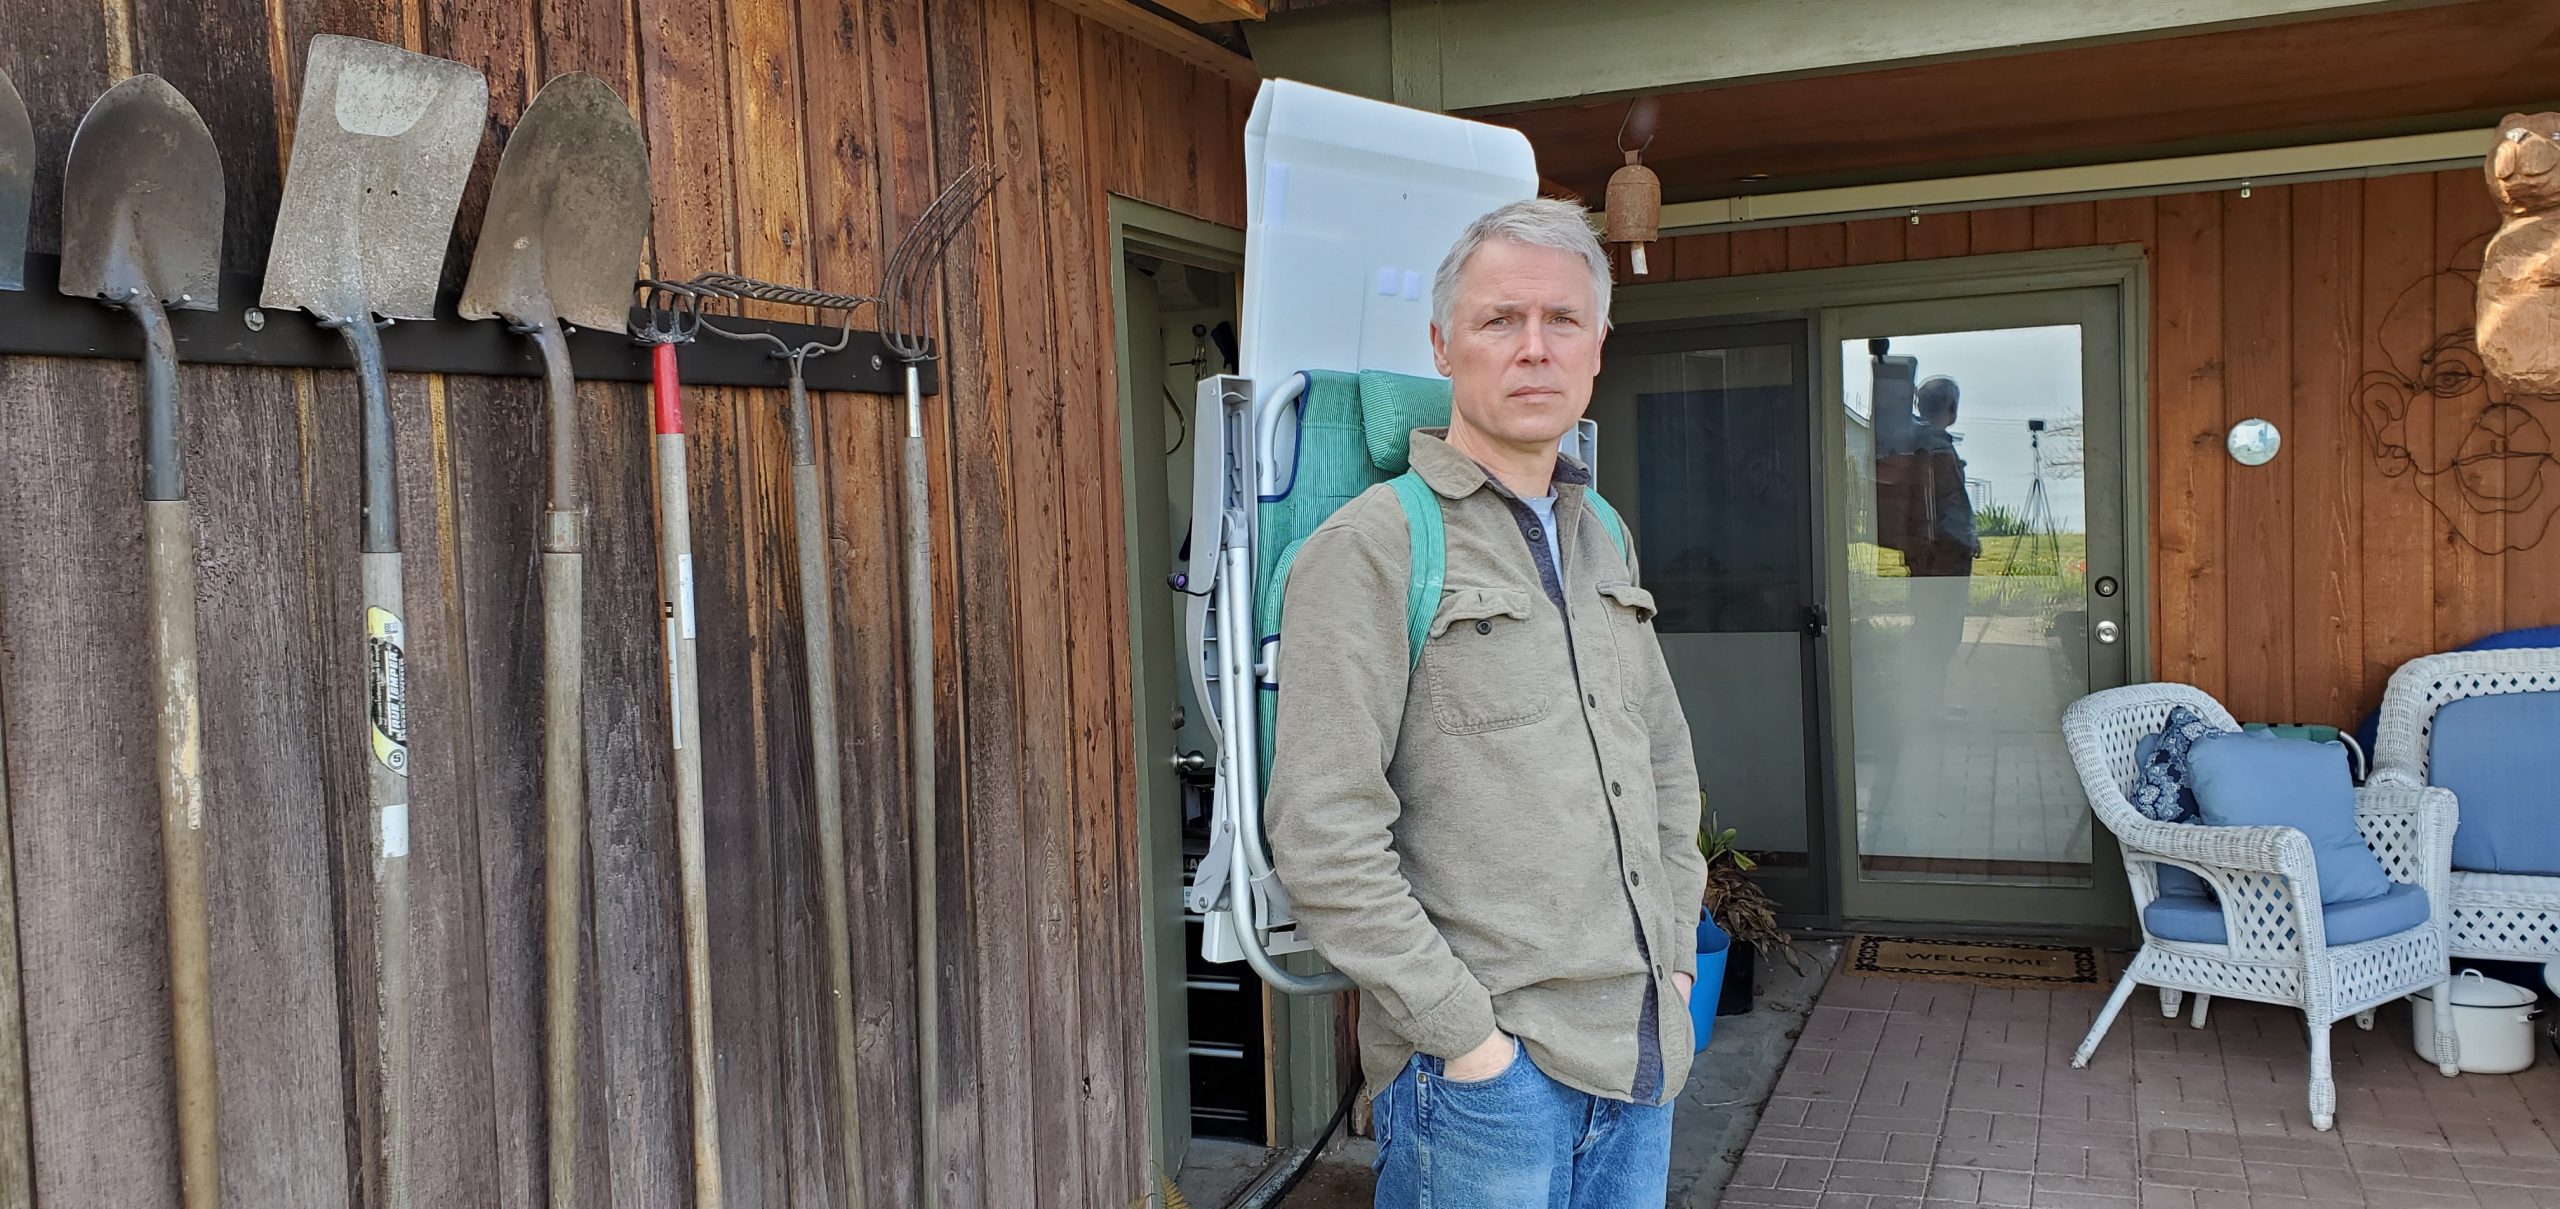
From my past experience I felt an arc was the best structure for strength and aerodynamics, but the problem was you need the long arced roof panel to stay in one piece to maintain the arc. I decided to try and cut the panel in two and place a 16″ wide stiffener down the center using velcro. This worked and made for a smaller totable package. The wall panels each fold in three’s bringing down the size. It fits perfectly between the leg rest. A bungee cord is enough to secure the shelter in place.
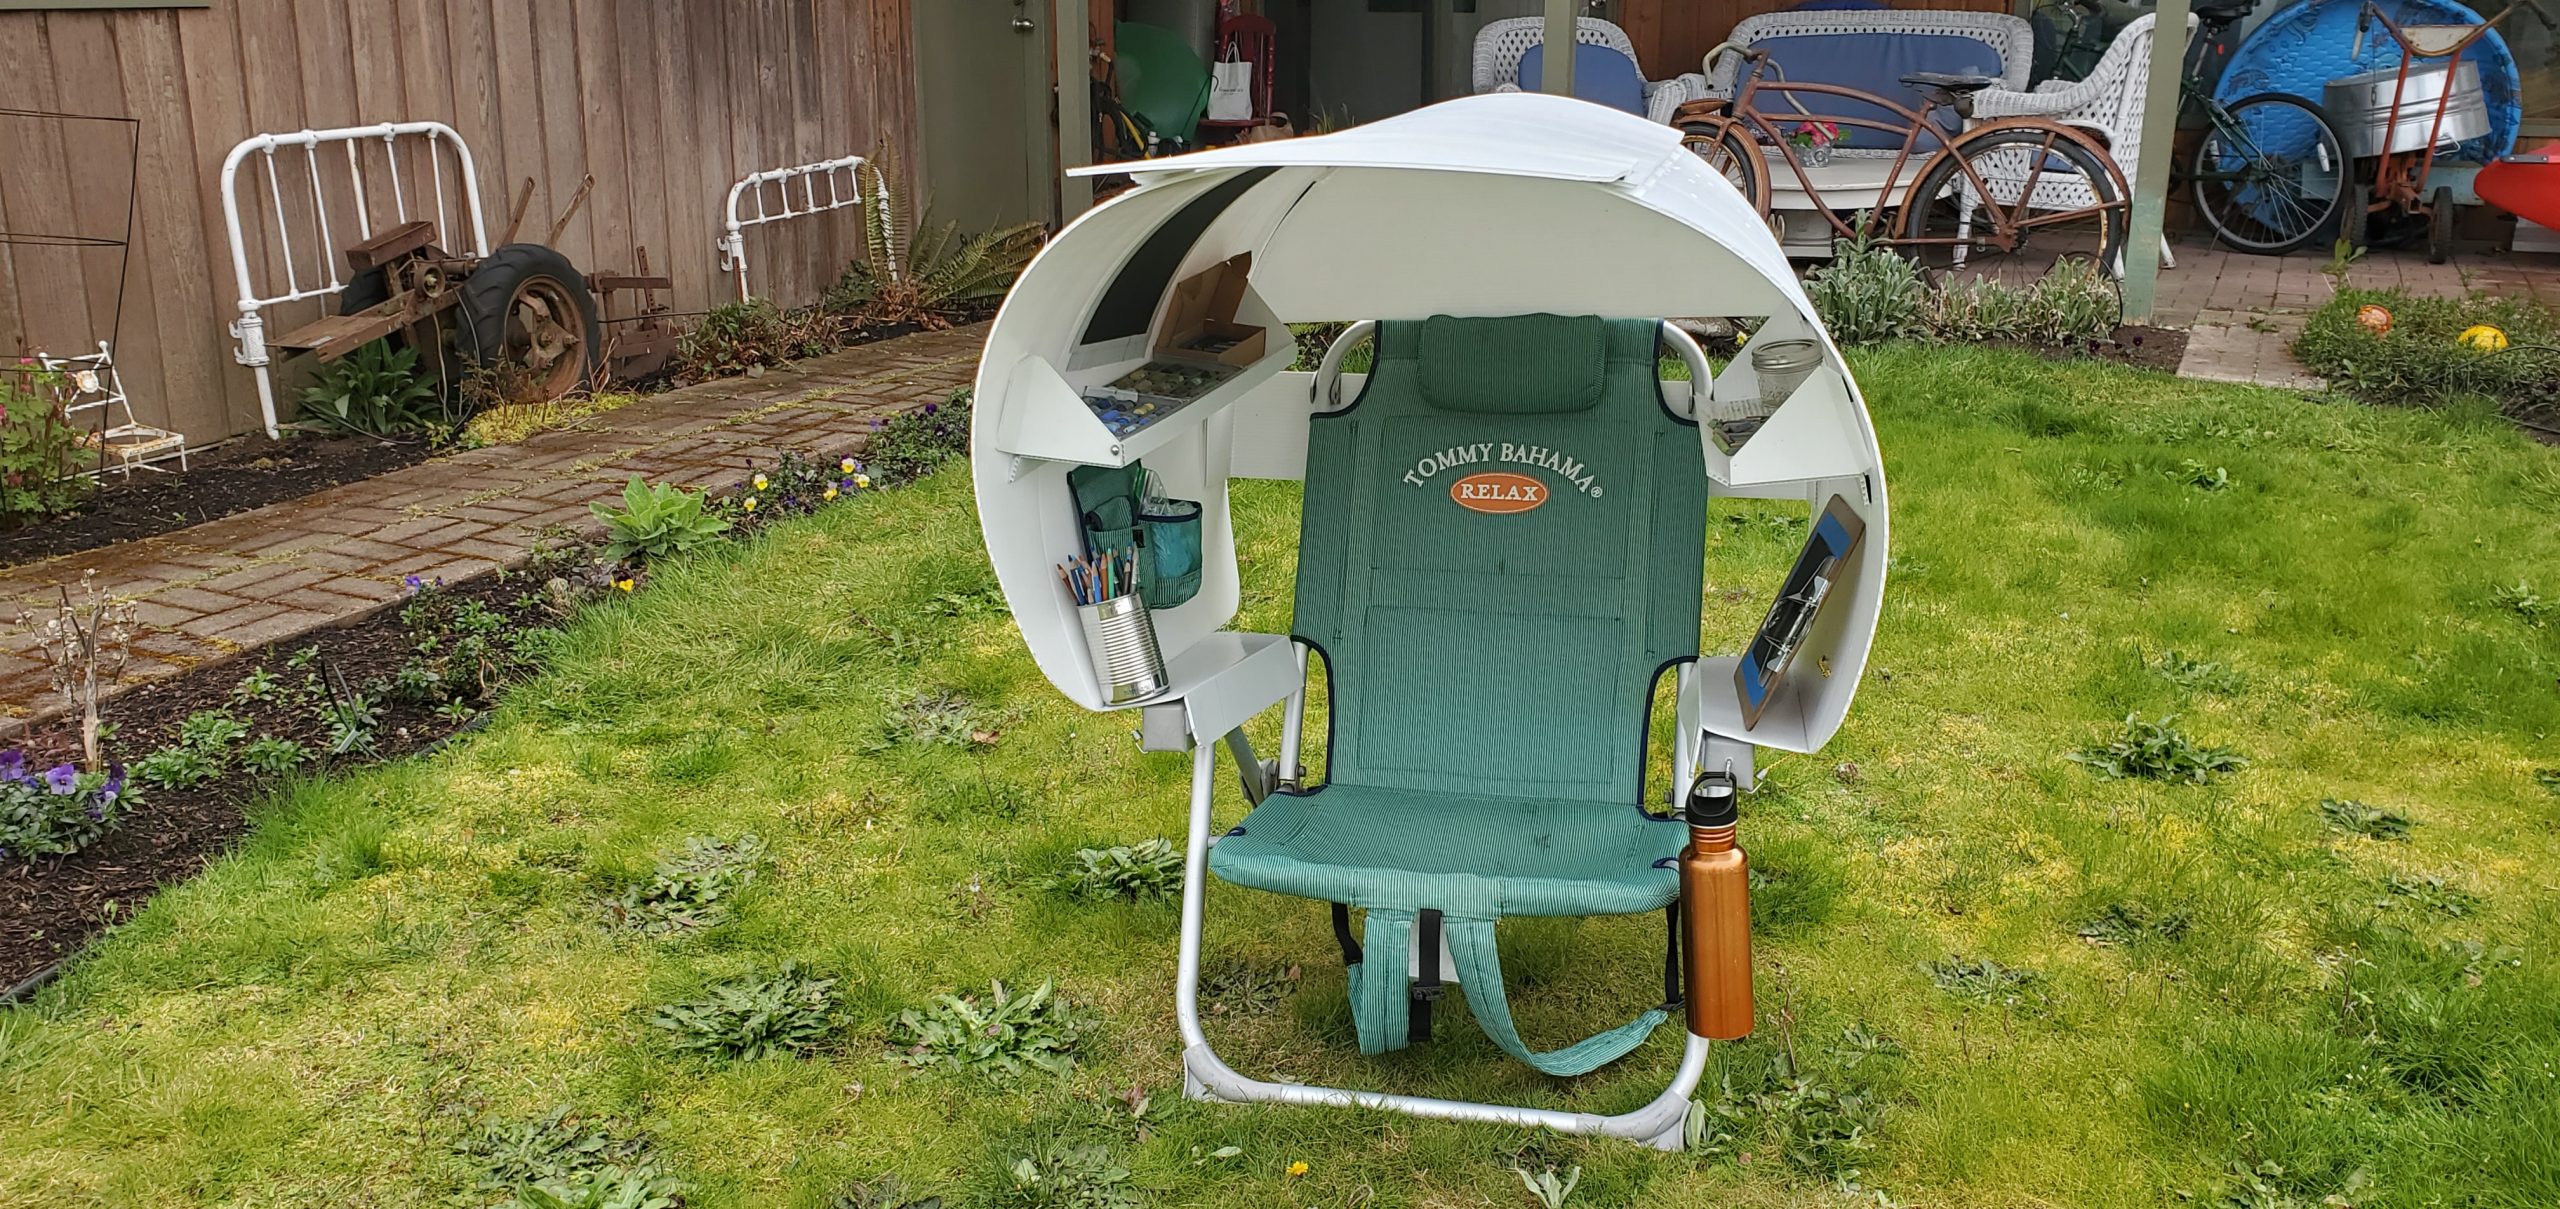
The tin can has Velcro on the bottom. For the water bottle, an eye hook was added to the arm rest end. The structure attaches to the chair inner arm rests using Velcro strips.
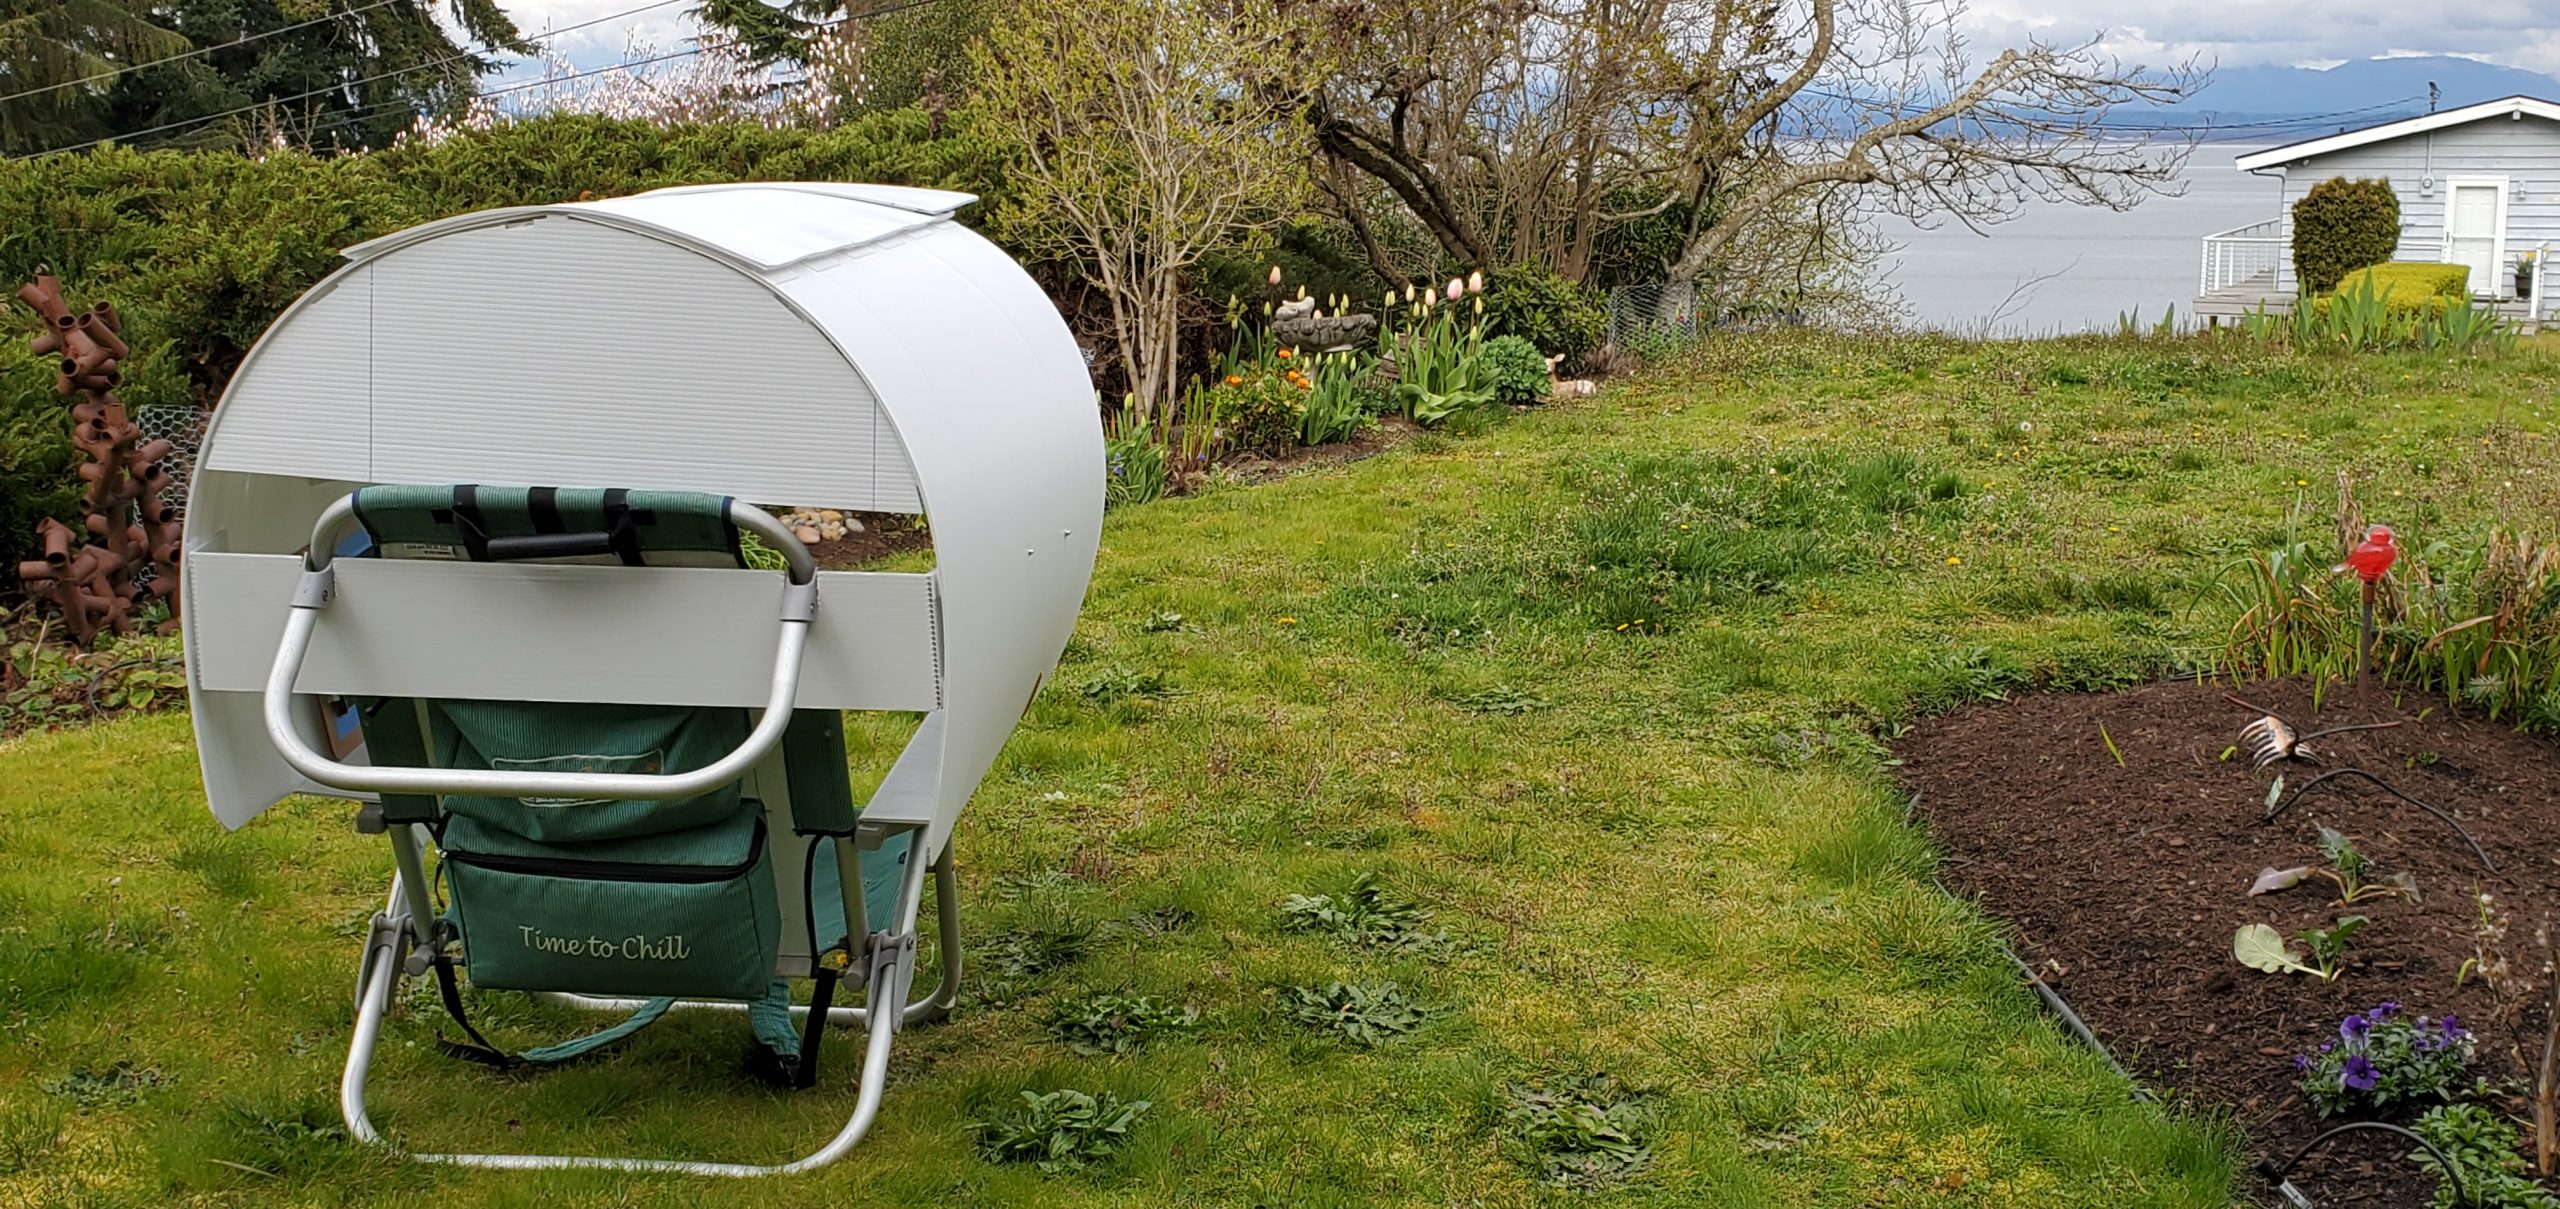
Here you can see the center roof panel (with rain extension). The back top section helps keep the sun off my beating on my neck and wind from blowing thru, plus the bottom rests on the chair. The narrow back bottom panel is slotted to fit around the chair leg support. This helps from swaying sideways during winds.
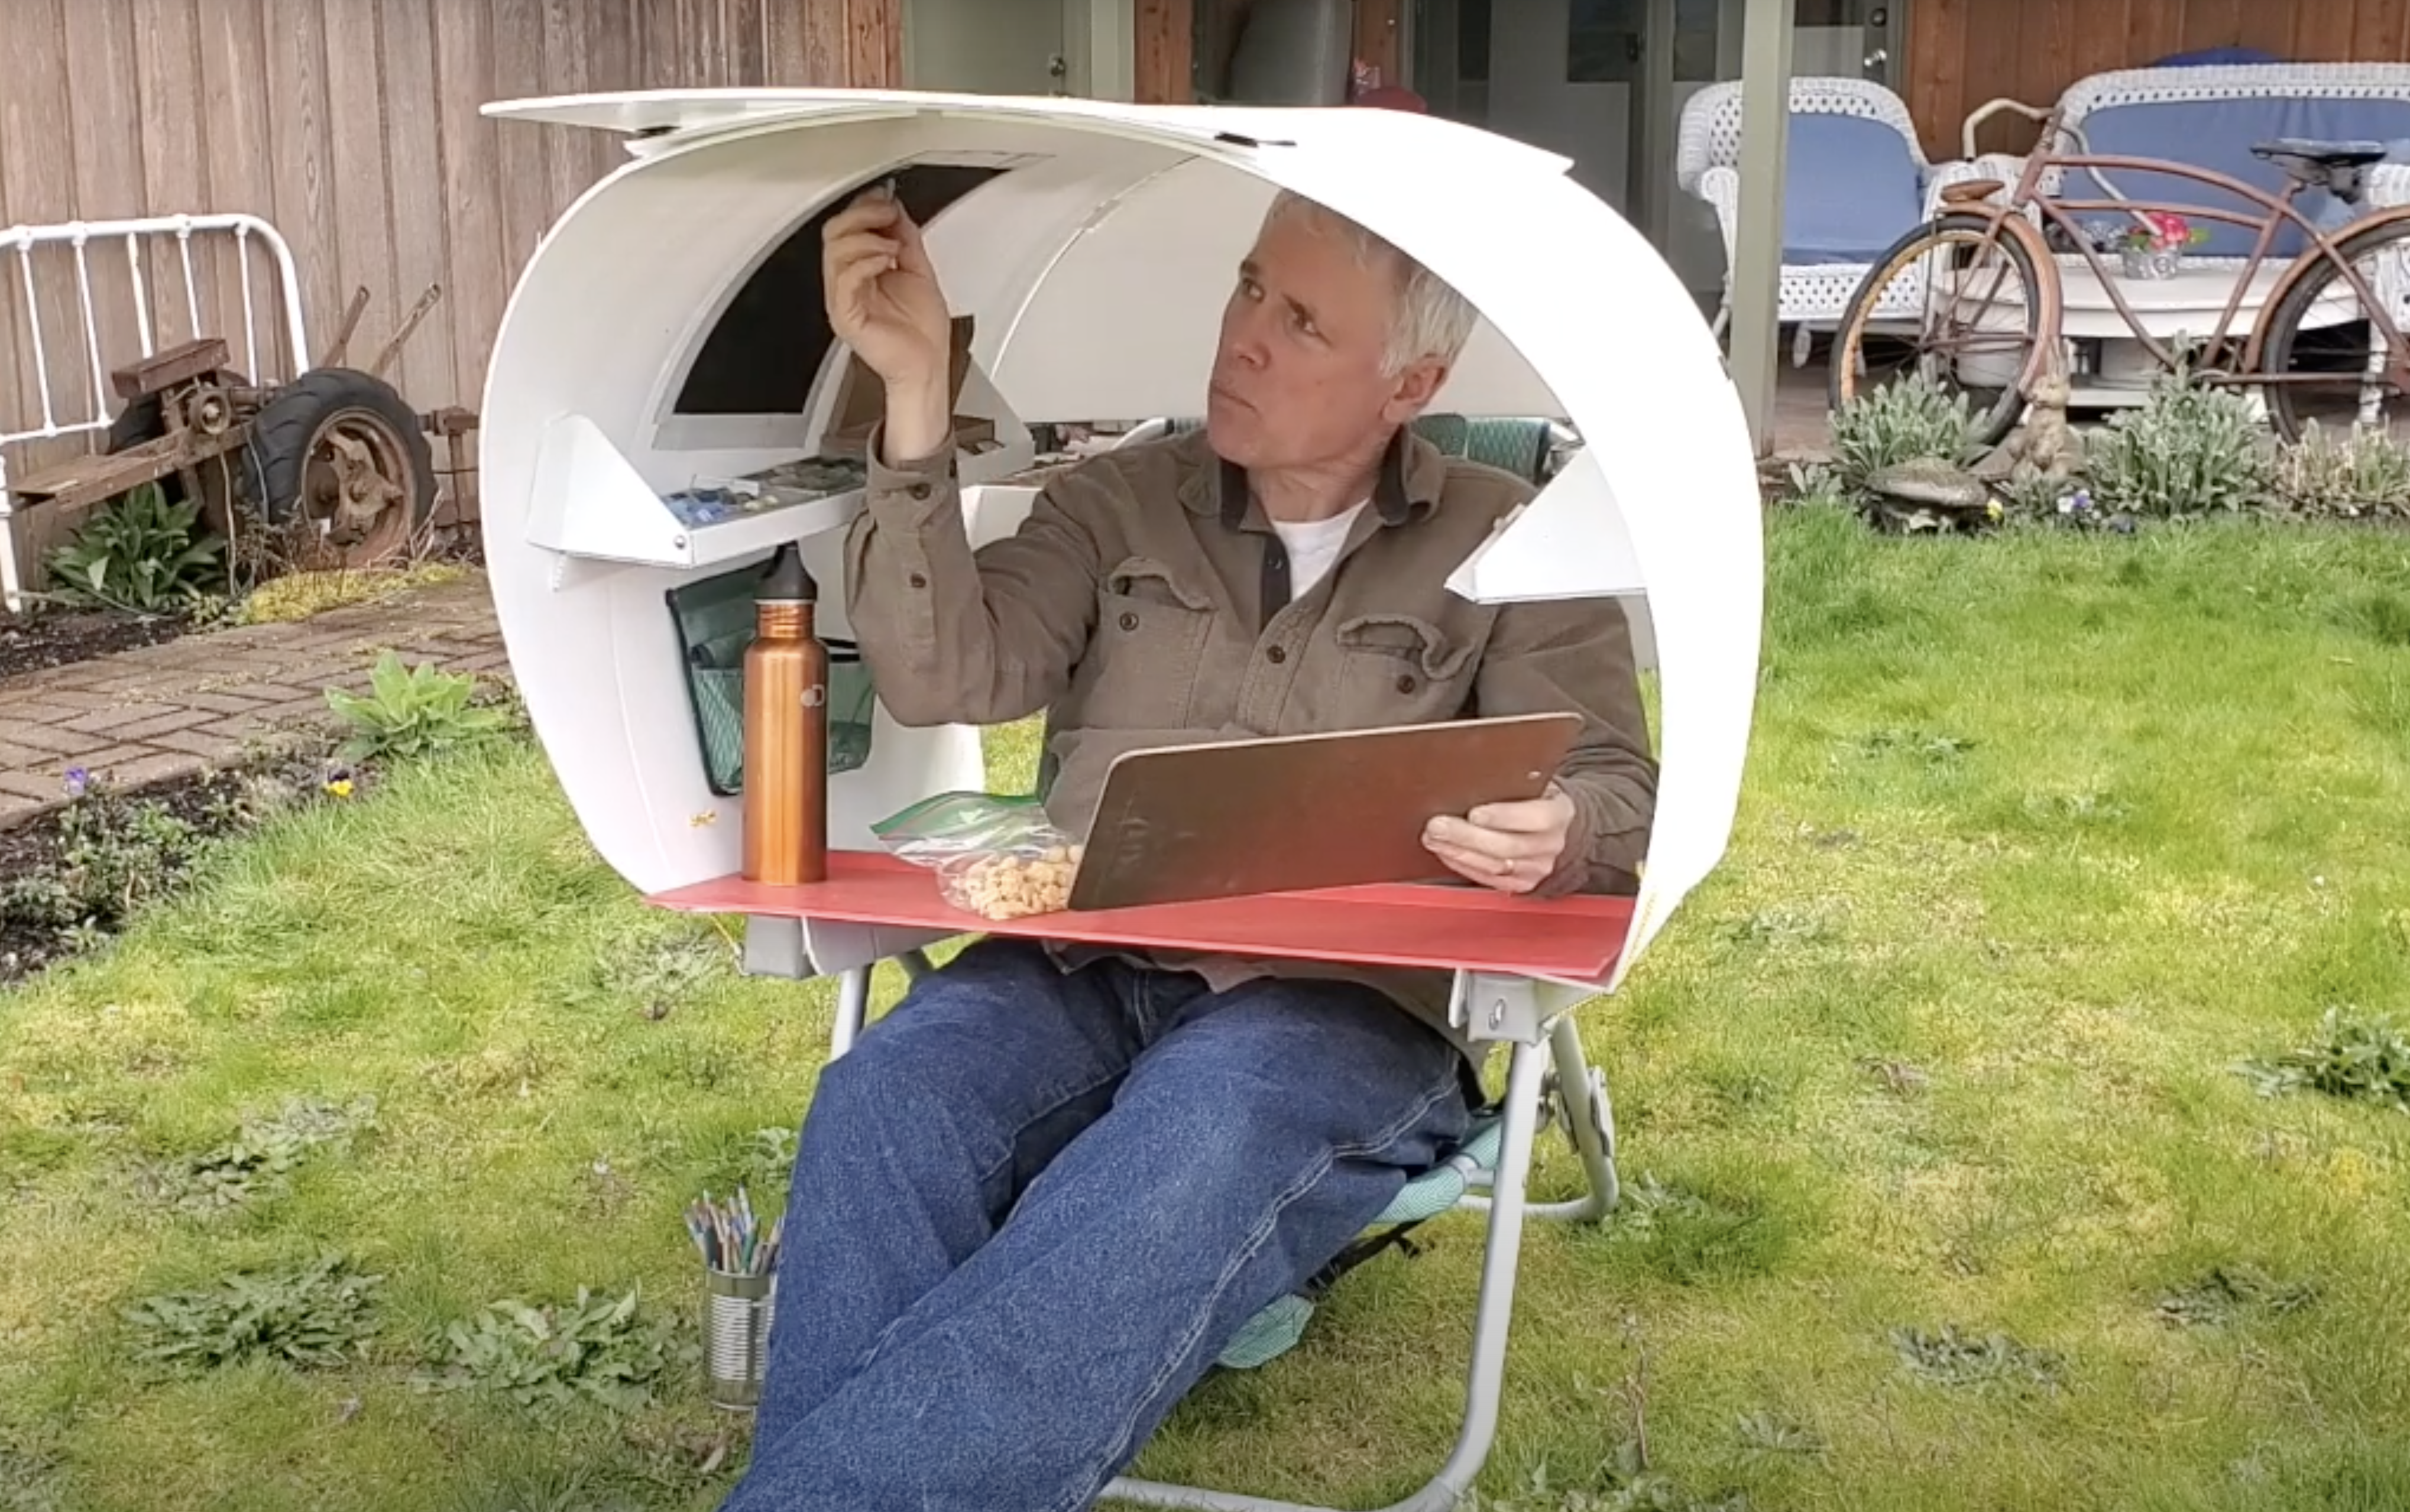
An extra panel is used as a tray for snack items. Here I’m using the scratch pad to get a feel for the tru color of my dusty old pastels before applying it to my work piece.
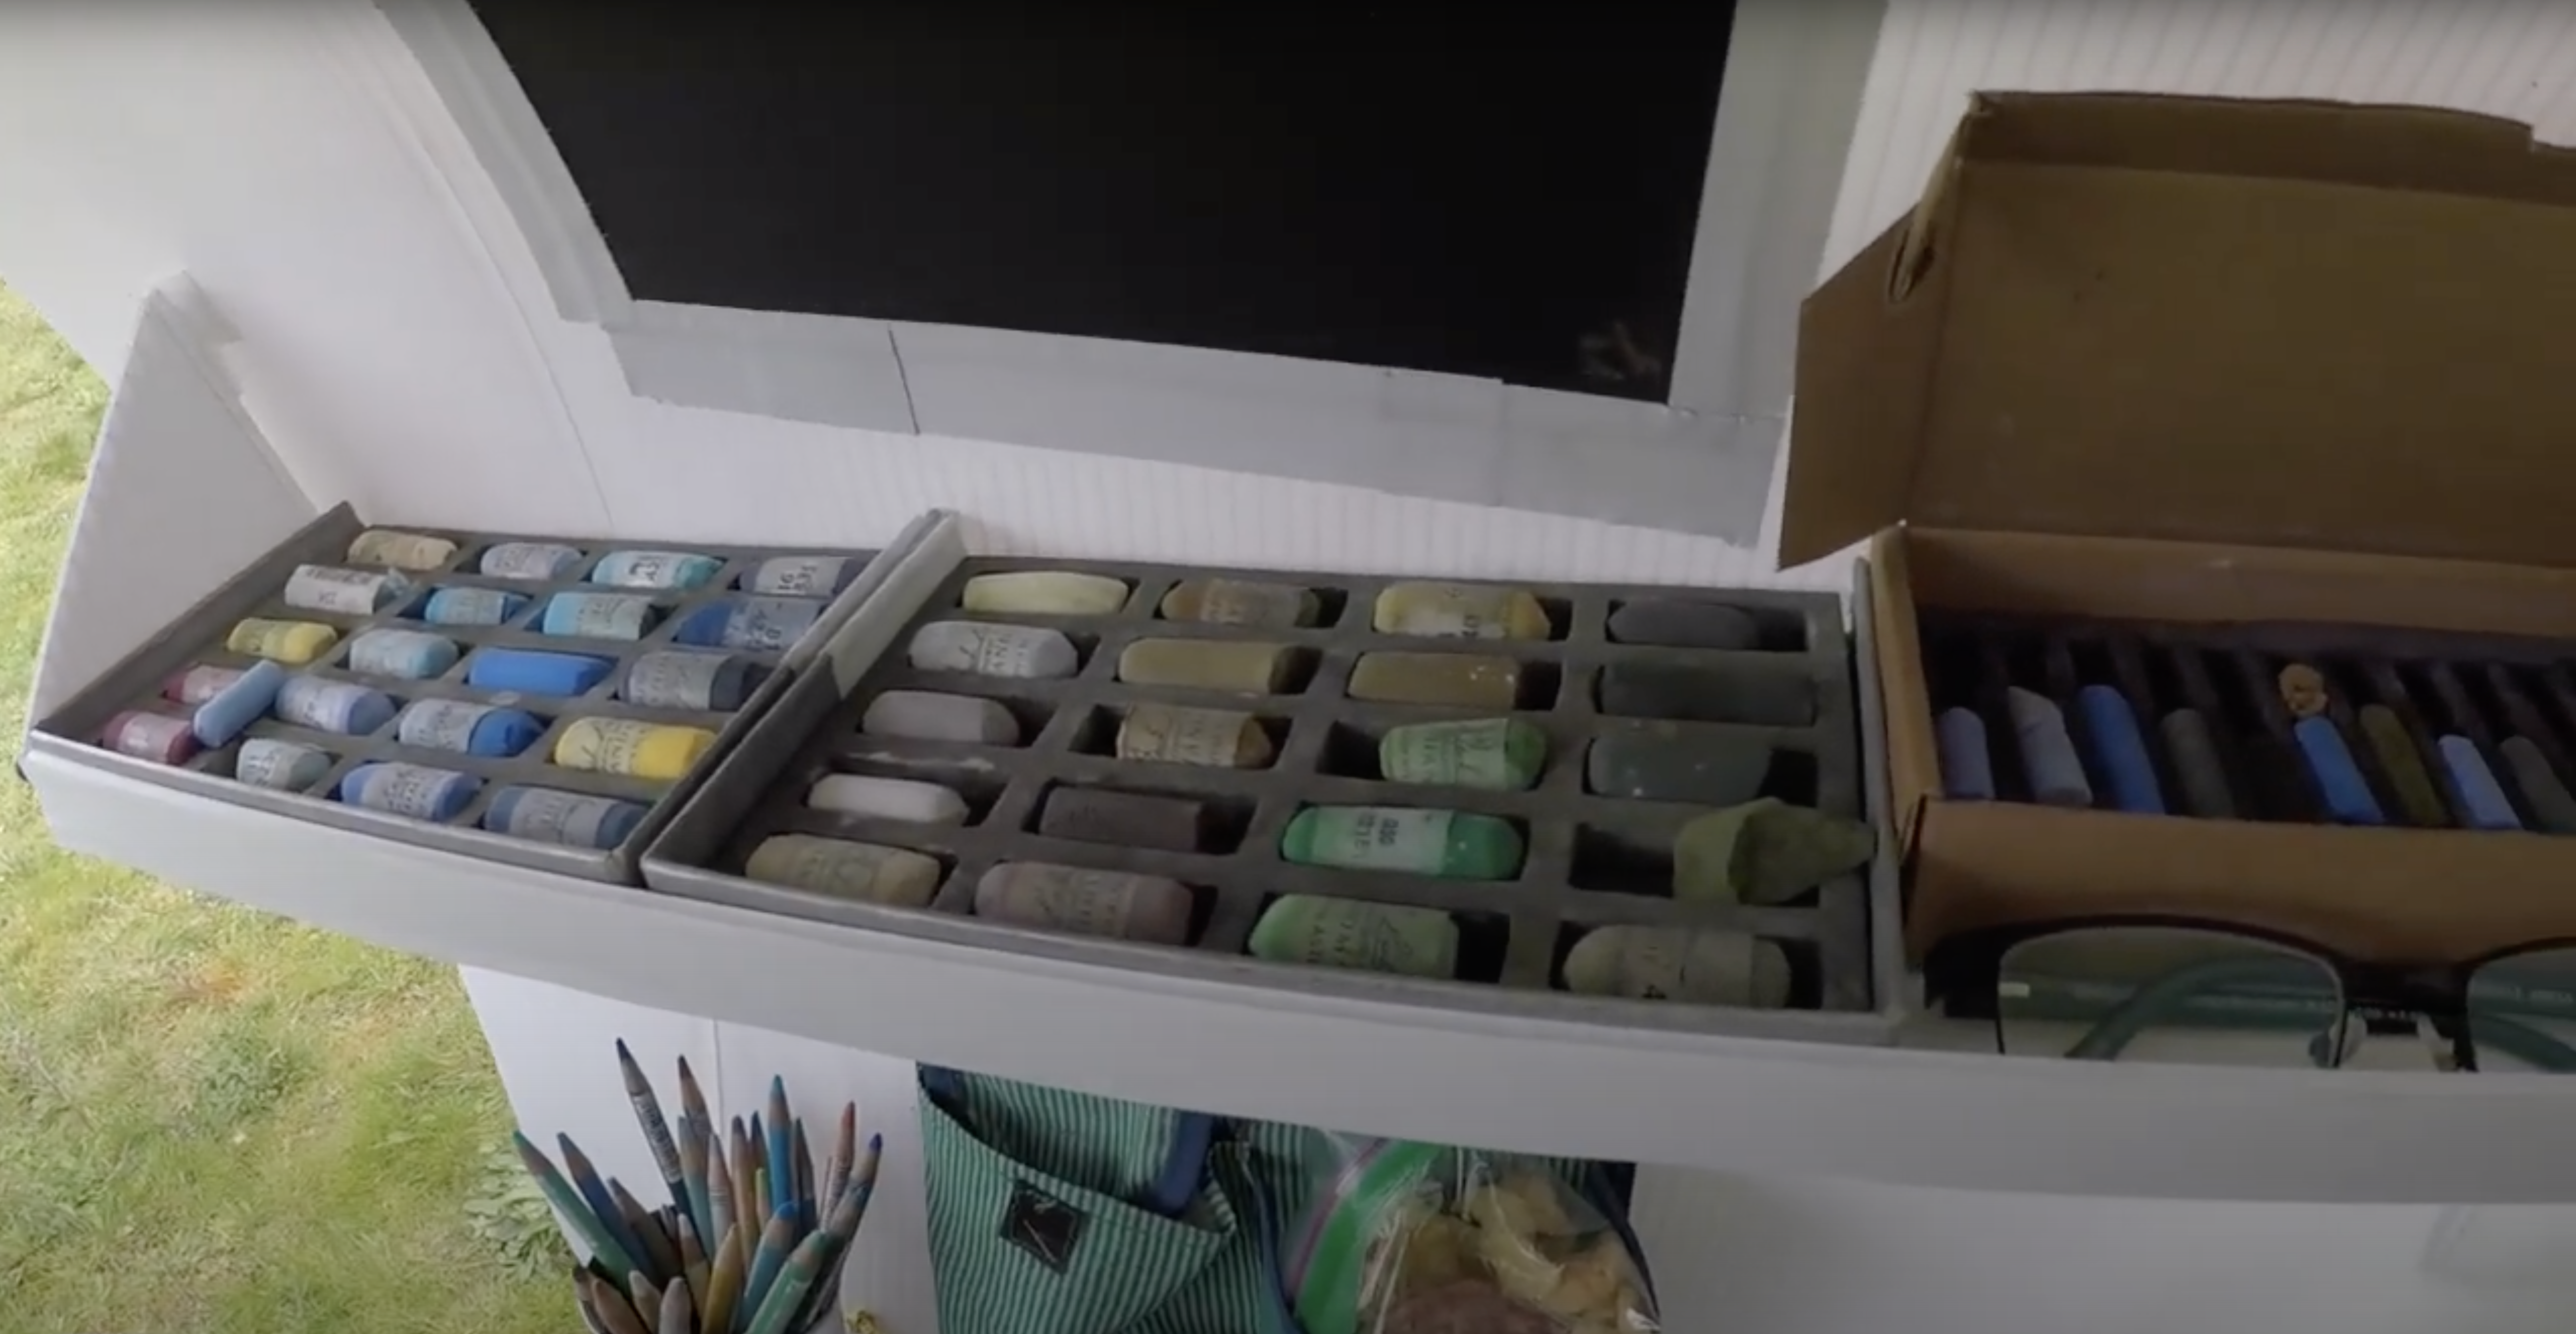
The shelver are the best feature. Before having this I was exposed to the elements and had all my pastels laying on lumpy, grassy or wet ground all around me. Not too practical, especially when it started sprinkling. I even have room for my spectacles! Below is my snack pouch as well.
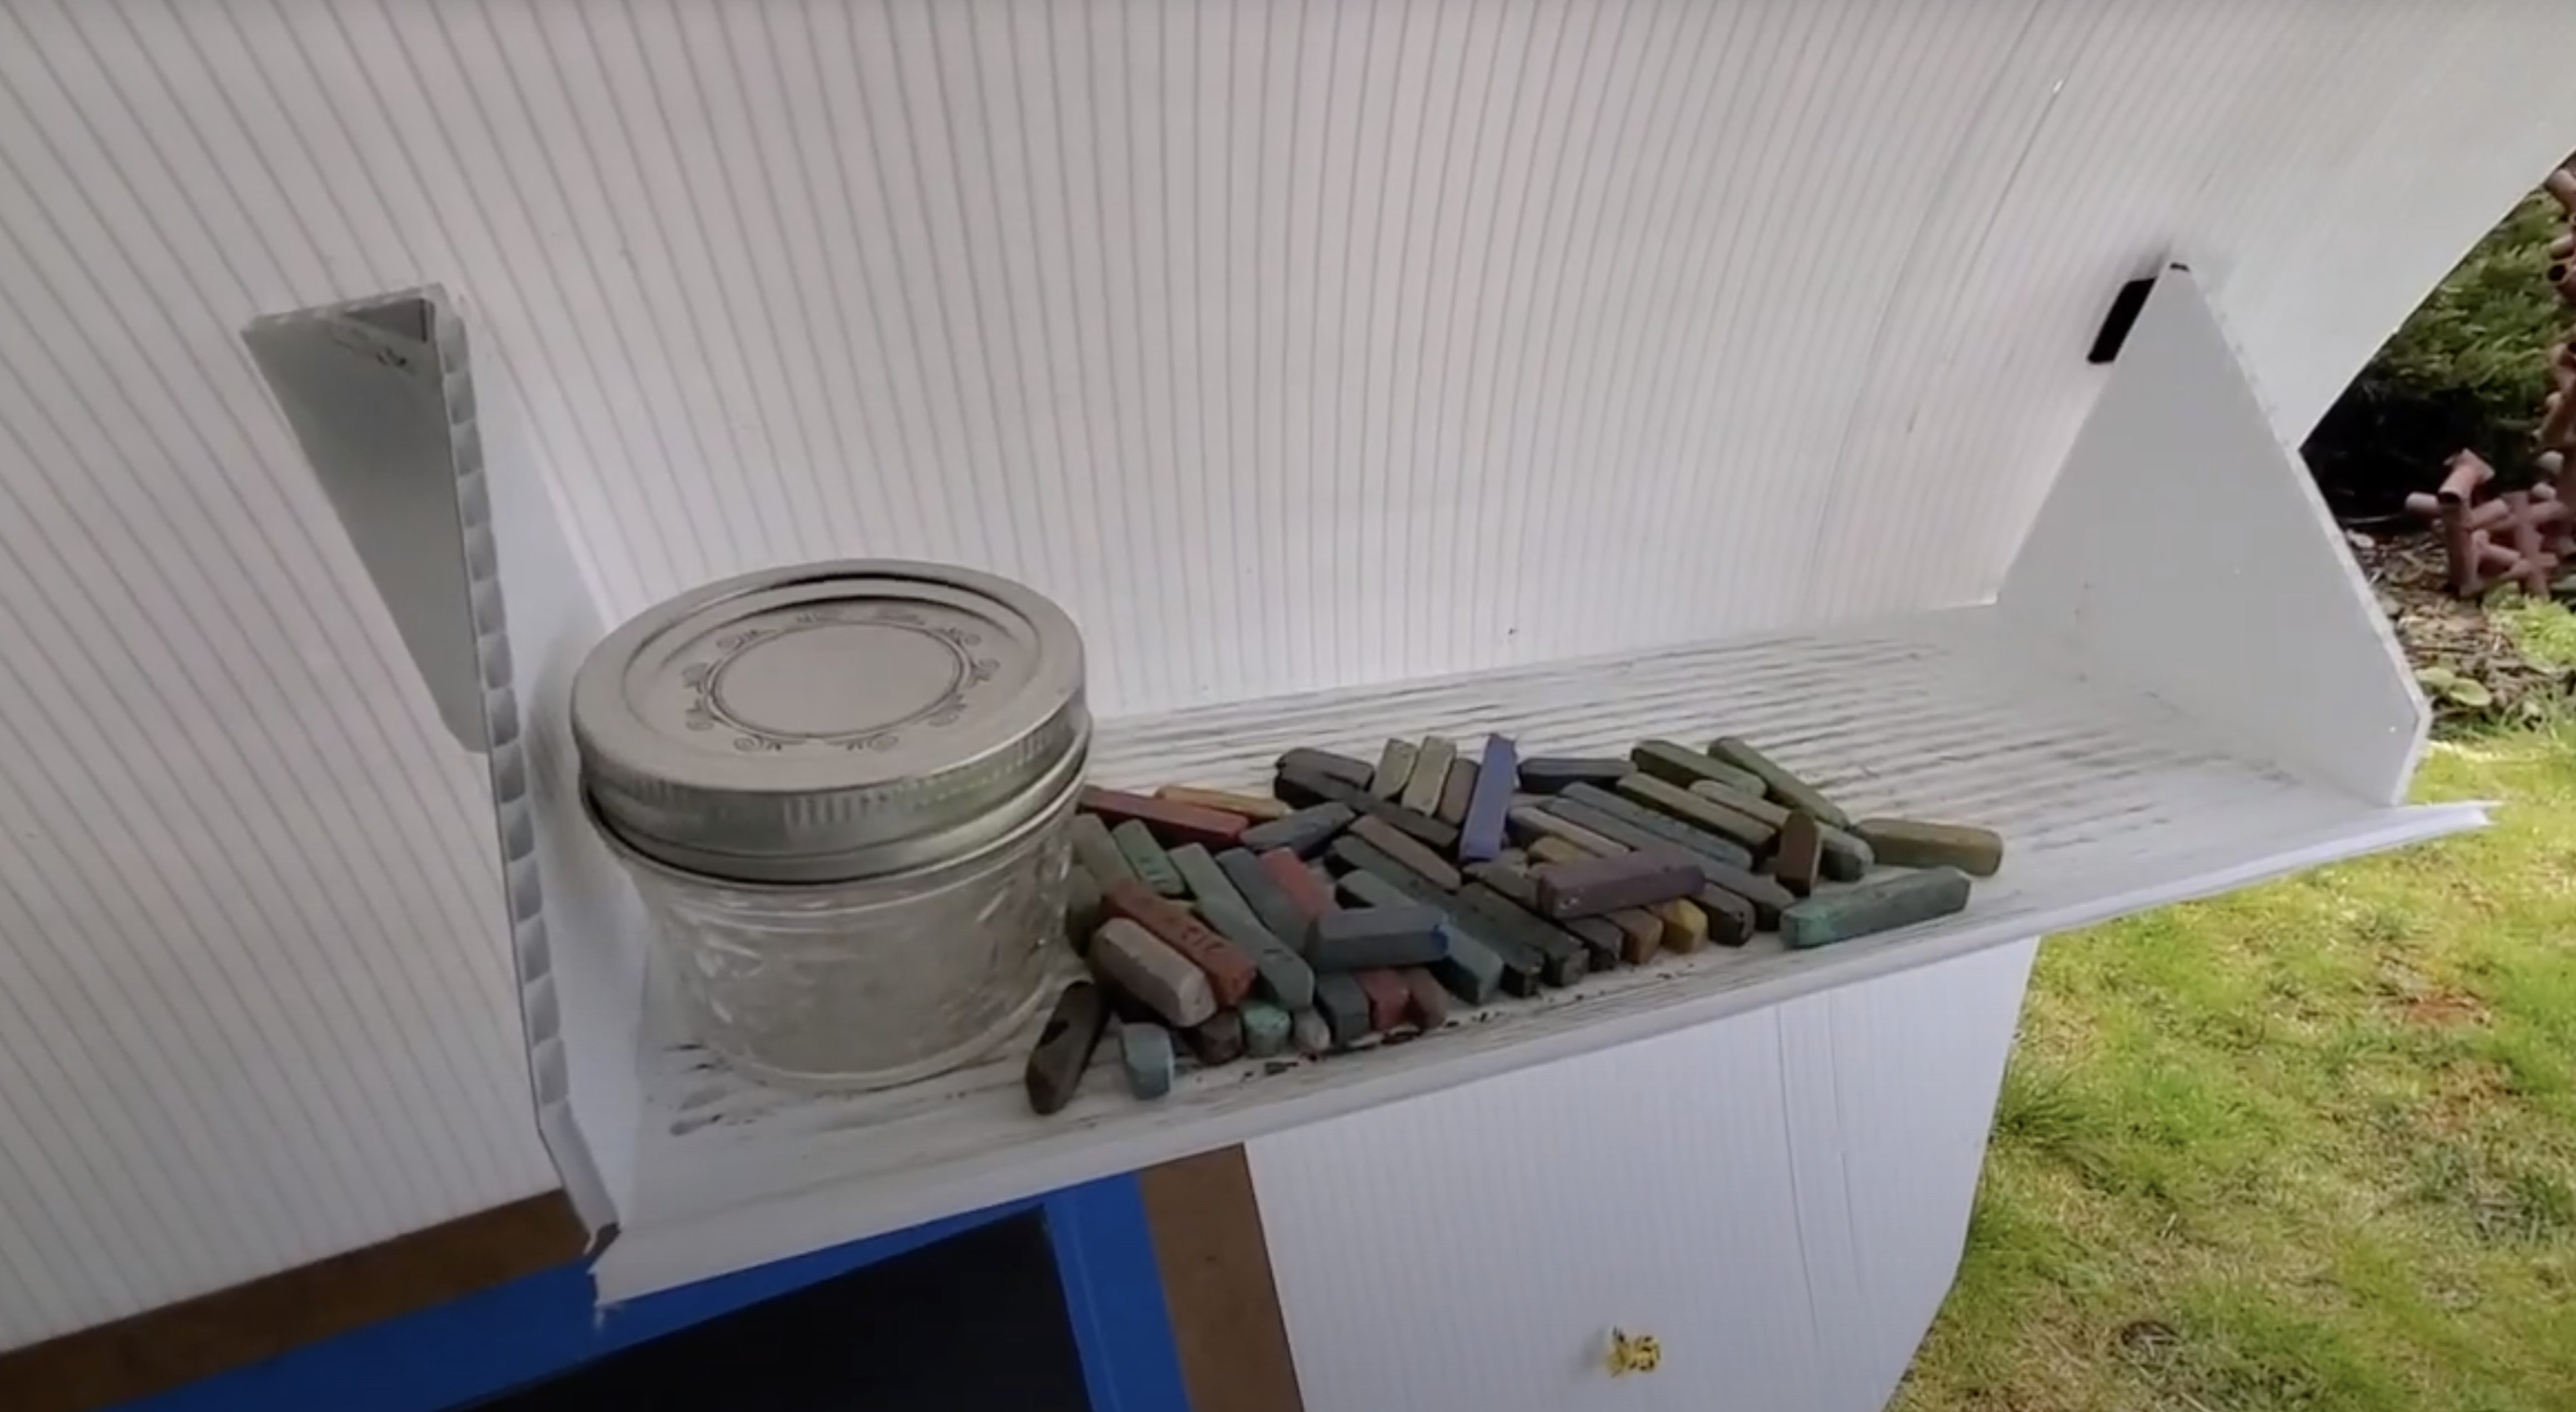
This shelf houses my cell phone for playing music or podcasts. It also holds my old dusty pastels sticks.
I start by attaching the side panels, then I add the center support, arc the panels together then attach the center support to the other panel. Then I add the back supports followed by the shelves.
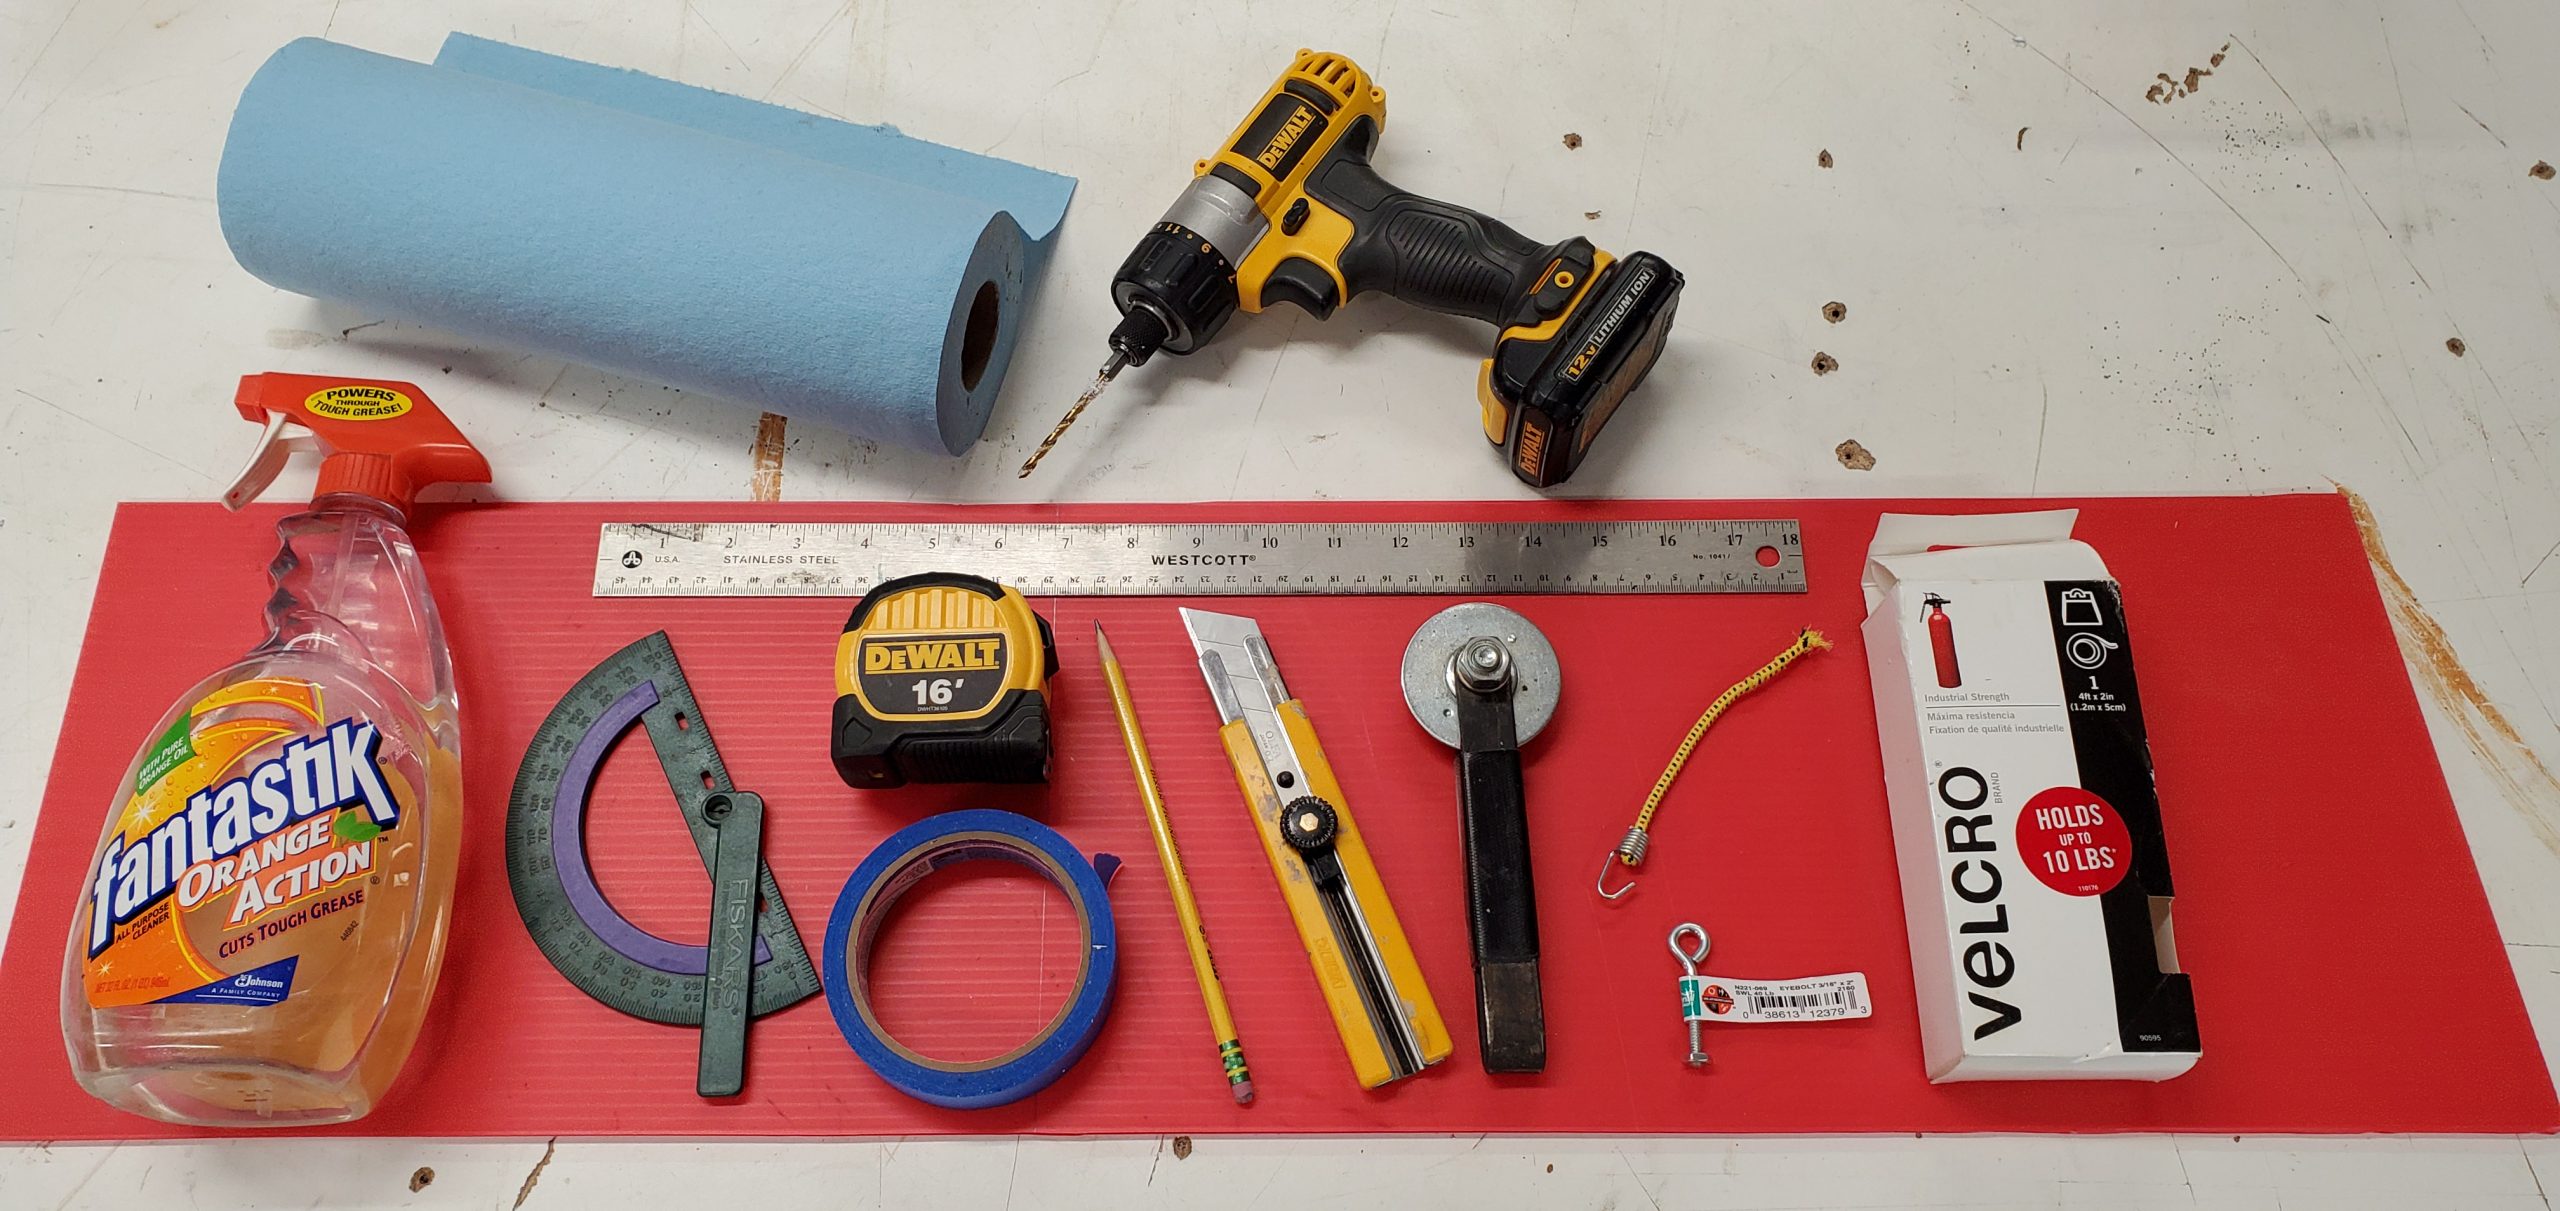
Here are the tools I used. A drywall TEE square was also used for the long cuts.
If you are interested in making this shelter you may want to check out my VIDEO for more details.
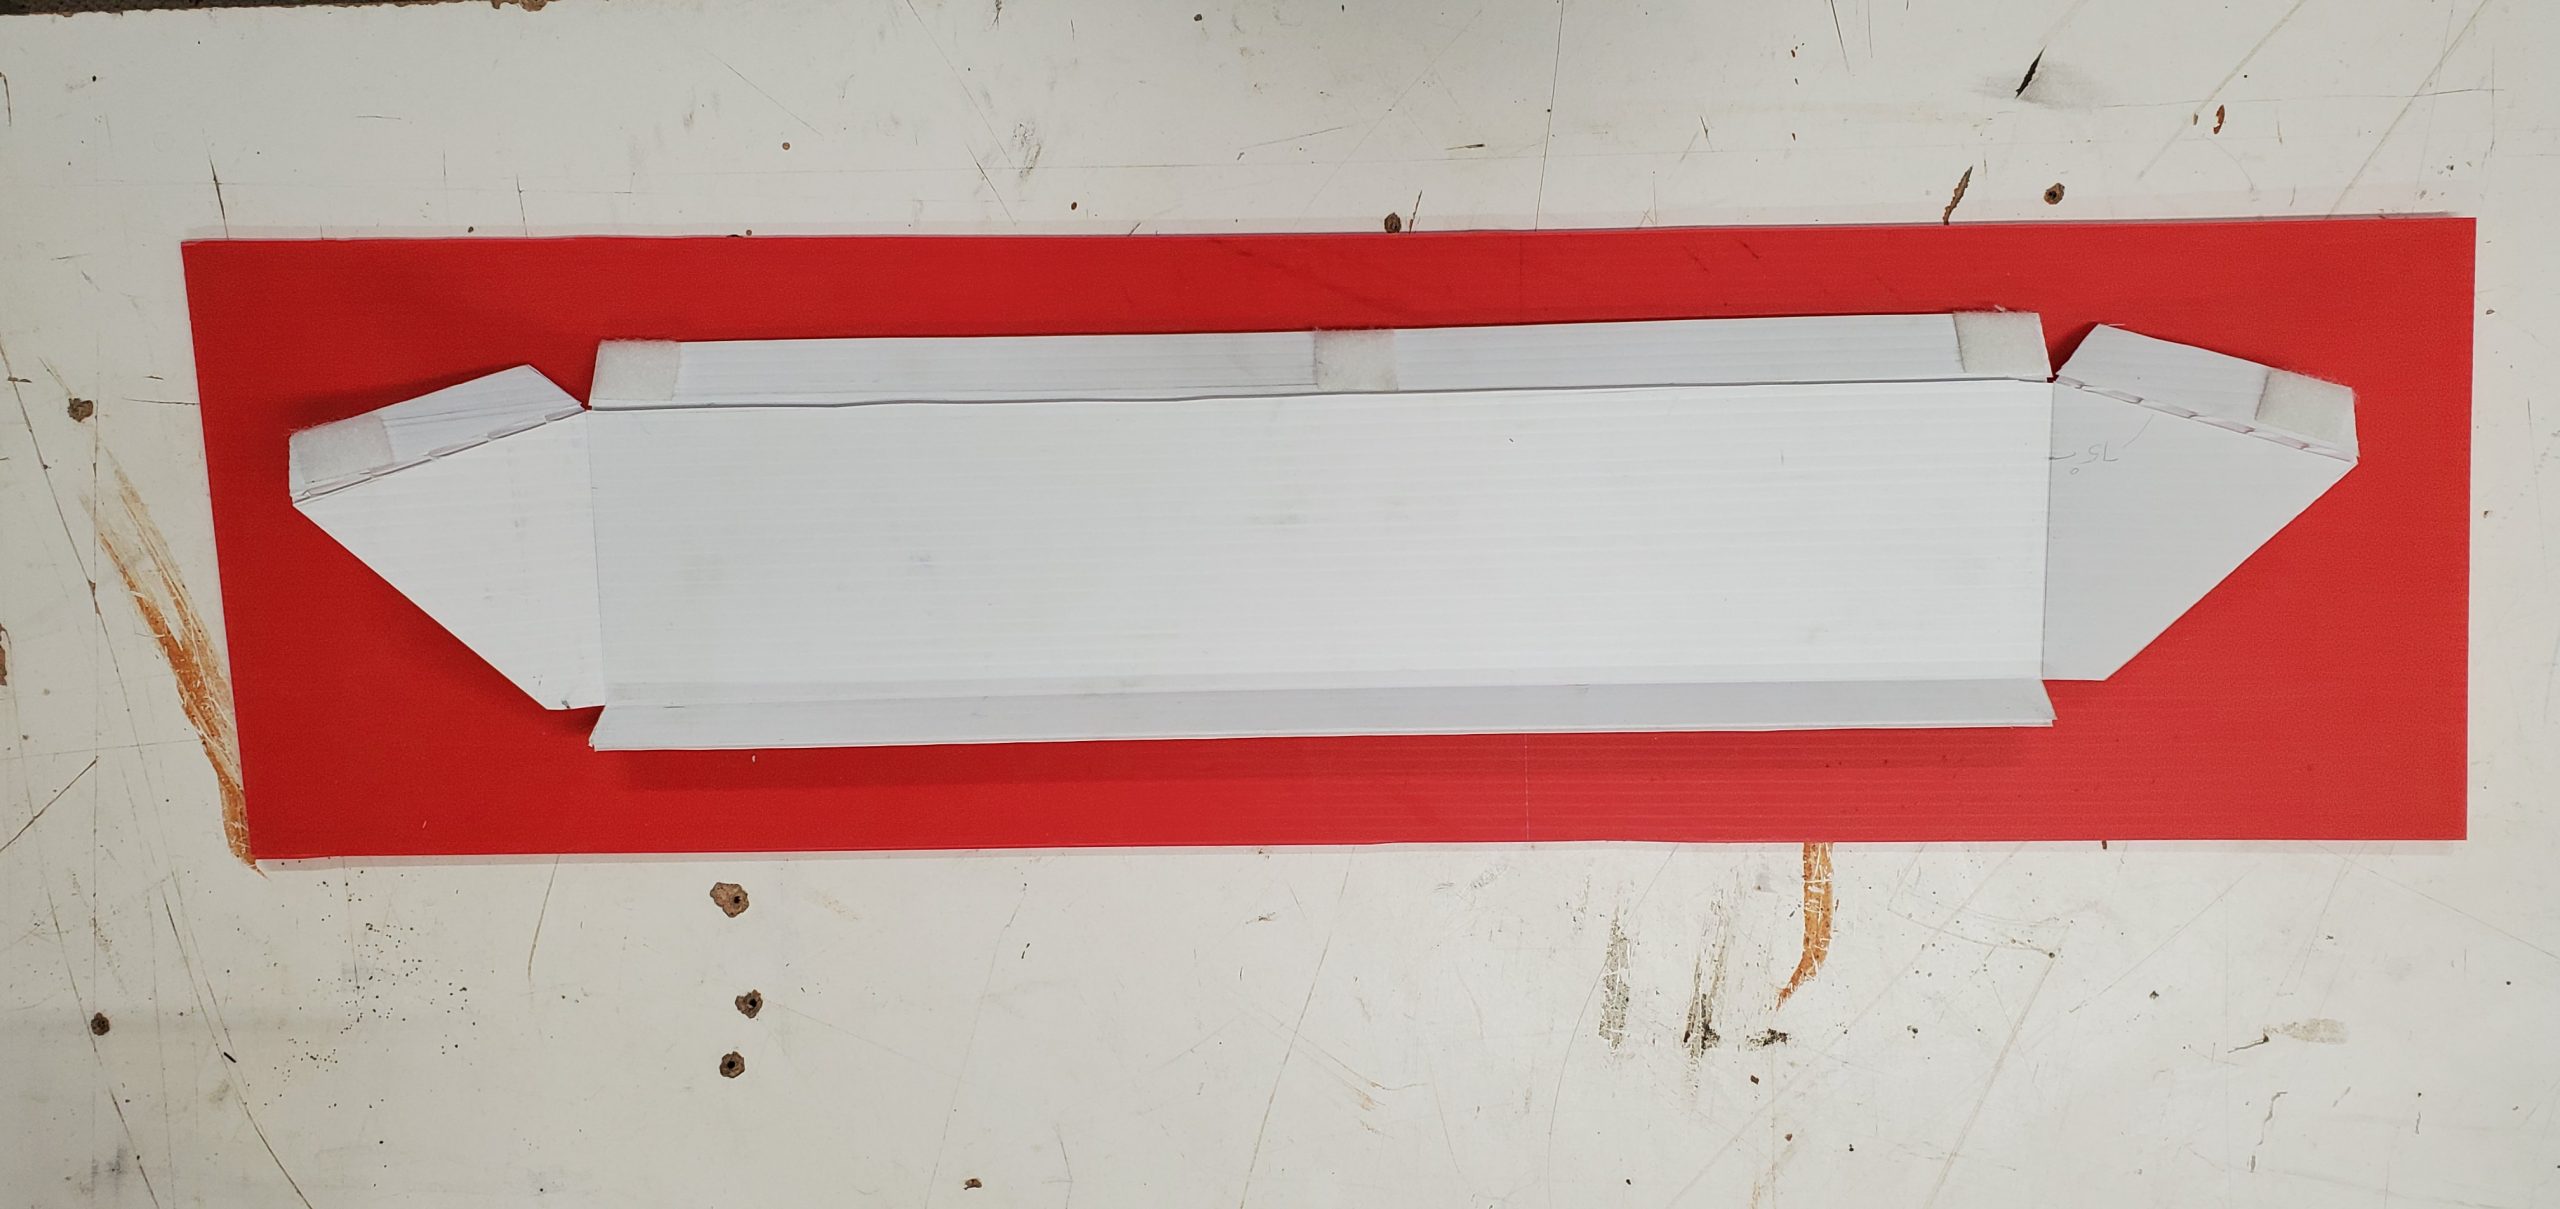
Here’s what the long self looks like when laid flat. Once the narrow top support hinge cuts were made, the panel was flipped over and the support triangle and lower lip hinge cuts were made.
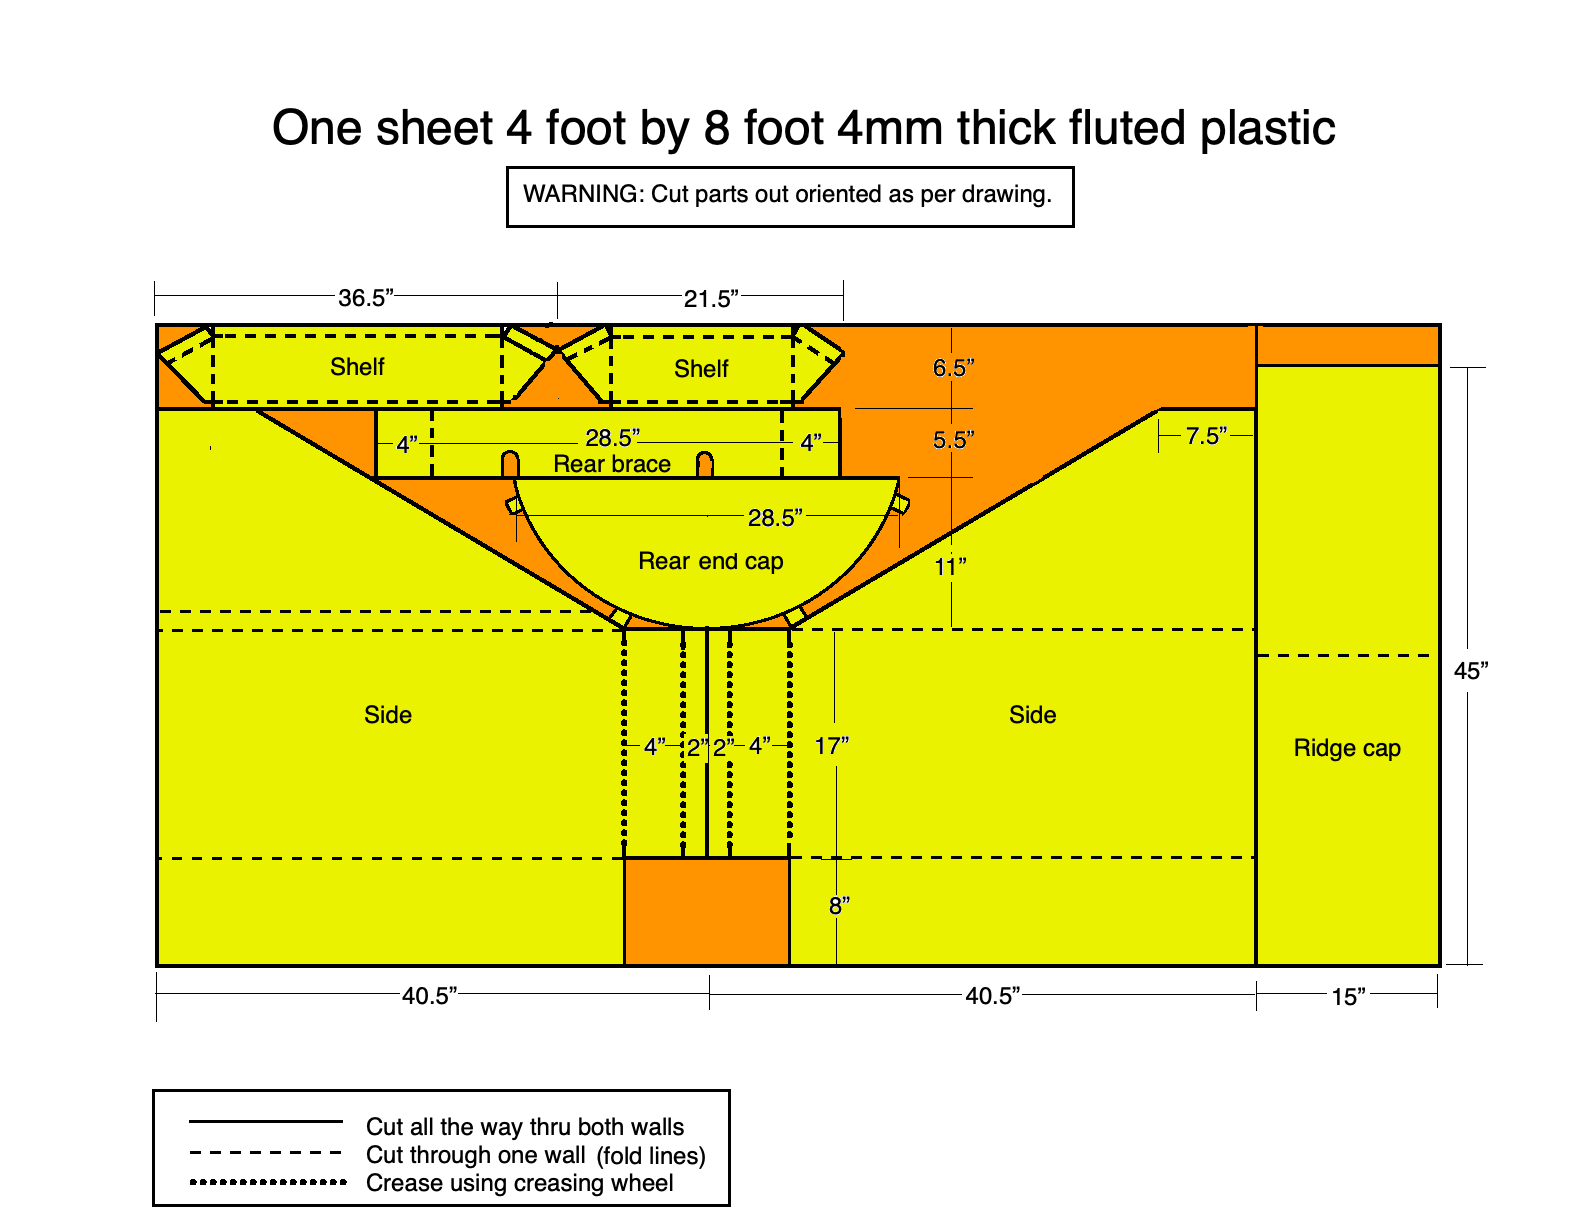
This drawing should be enough to make your own micro mobile art studio. Contact me if you have any further questions or if you’d like to send me pictures of your shelter. I’d love to see what you come up with!
Posted in Fluted Plastic Projects, Mobile Shelters